Monday, October 26, 2015

Bimini Renewal: One Third Done

OK, as promised, here is the result.  I am one third done with redoing the bimini and dodger. That is, I have completed the bimini roof (I am excluding the side curtains and the dodger front from consideration at this point in time - the vinyl is still serviceable, and because these surfaces are not horizontal they have not suffered sun damage to the same extent).


I think it came out pretty good. In fact, it looks about as good as the original did when it was new and before shrinkage pulled everything tighter than a drumhead.

So, can you do this yourself?  The answer is yes.  But first, I strongly recommend that you view the following Sailrite video: How to pattern a bimini. There used to be another video on the website that took you thru the process after patterning, but they have apparently taken it down. But if this whets your appetite, then get this DVD and study it, thinking thru each thing that is done, and understanding why it was done.

First, nomenclature.  In the roof panel I made, there are three major piece types:
  • The roof panel itself - the largest piece of fabric by far
  • The sleeves.  These pieces of fabric form the sleeves which zipper around the tubing at the front and rear of the roof panel.  
  • The tails.  These are the narrow strips of fabric that hang down at the front and rear of the roof panel - they serve as the attachment points for the side curtains (at the rear - on mine you can see the rivets holding the Common Sense fasteners) and the center panel (at the front).
  • There are also some narrow reinforcing strips that go on the bottom edges of the sides to strengthen the attachment points for the side curtains.
If you decide to tackle this project I have the following recommendations for you:
  • Use Tenara Teflon thread.  I can't recommend this strongly enough.  The special "UV resistant" polyester thread will last approximately 5 years (in the PNW - less in the tropics).  The Tenara thread will last indefinitely - far outliving the fabric.
  • When sewing, use the basting tape that Sailrite sells.  The stuff you can buy in your local fabric store is designed to wash out and is a far weaker adhesive.  Use 3/8" for most seams and 1/4" for zippers.
  • When installing zippers, make sure that they will be covered - that is, protected from the sun.
  • Tools - you should buy these tools and consider them part of the cost of the bimini.  Your cost will still be far, far less than what you'd pay for professionally built canvas.
    • First and foremost, a walking foot sewing machine.  You just can't do this work with a home sewing machine. I have a Sailrite LSZ-1 and love it.
    • A binder of some type for applying bias edging tape
    • This nifty tool set for installing male Common Sense fasteners
    • This punch for installing Common Sense eyelets
    • Please note that my project did not require installation of snaps, Lift The Dot fasteners, etc. so I have not included tools for their installation here.  But if you need these fasteners you should look carefully at the tools that Sailrite offers.
  • If you are doing what I did, replacing an existing bimini, you can pattern right over it without removing it.  This allows you to get a better take on where the edges need to be, and saves a lot of labor.  You should apply the seam stick tape directly to the old bimini without an intervening layer of some other kind of tape.  It holds better, and yet can still be removed after the patterning.
  • For the panel to install correctly and fit well, it is critical that you consider and think about things like this:
    When patterning, the line defining the front and rear seams (where the sleeves and tails attach to the roof panel) should be made, not on the top of the tubing, but rather 90° away on the front (or rear) side of the tube.  Doing it this way makes it simple to attach the other edge of the sleeve.  Magically, you can just smooth the sleeve flat against the roof panel and stitch the zipper where it lays, without making any allowance for the wrap around the tubing whatsoever. I know that doesn't seem right, but it is.  Get out some strips of paper and try it out - I know that I had to in order to convince myself.

    If on the other hand you need for the seam to be on top of the tubing (as for example if the seam joins two adjacent roof panels over an intermediate support), then you cannot simply lay the sleeve flat to determine its attachment point to the roof panel.  Instead, lay it flat, mark the edge, and then move it back 1.25 inches (I think...  get out your paper strips and confirm this number - it will depend on the size of your tubing) and attach it there.  Because in this case you do need to account for the wrap around the tubing, and it's a surprisingly large amount.

    If you should use a top seam for the forward edge of your roof panel, you will need to make the tail wider by half the diameter of your tubing so that it will extend the desired distance.
  • You will face a decision whether to use "hang down" tails or "tuck back" tails.  Hang down tails are just straight rectangular pieces of fabric; tuck back tails are contoured to match the edge of the bimini to which they will be attached.  I initially made mine with the hang down tails, but I was disappointed with the way they, well, hung.  Because they are straight fabric pieces, they do not follow the contour of the bimini - they just look bad.  I made new tuck back tails, ripped out the seams and installed them.  
  • When laying out the sleeves or the tuck back tails, the video may encourage you to use the pattern to determine one edge and then laboriously lay out a second line the desired distance away by making a series of markings perpendicular to the original line.  This is unnecessarily tedious.  Instead, lay out the first line using the edge of the pattern, pull the pattern back the desired amount, and lay out the second line, again using the edge of the pattern. 

As you can see, there are two more panels that need to be reconstructed. And that sail cover is looking pretty shabby too...


Previous post in this series

Share/Bookmark

Monday, October 19, 2015

For Better or For Worse

The great wheel of the seasons turns; the Earth continues inexorably in her orbit around the sun.  To those of us here in the north temperate zones, that means that the boat is put into "winter mode".  For some that means a haulout so that the water can freeze up without the restraint of an interfering hull.  For us in the Pacific Northwest, it means a backup set of docklines and an additional four fenders so that the boat can weather the winter storms safely in her slip.  (And to those of you in the South Pacific and Caribbean... pbbbt!).

This is the time of The List.   It is when we look our vessels over with a (hopefully) jaundiced eye, enumerating all the things that need to be done to have her ready for next spring, and to be in yet better shape than last year.  You see, all of us have taken a Vow with our boats, to protect and support each other in the best of times and in the worst of times.  And this is the time of year when our part of the bargain comes due.

So: The List.  What goes on it?  Well, all the normal seasonal maintenance projects of course.  But do you have a guilty feeling deriving from knowledge that the mizzen spreaders should be replaced?  That there is rot in the bowsprit?  That the primary bilge pump down in the deepest part of the bilge needs a spelunking expedition to repair?  Well these items go on The List.

And sometimes there is something that you want to do as a present to your boat in exchange for the good times she has given you - not something required, but rather as a gift.  Perhaps this could be a radar upgrade (not required, but nice!), or just something for her vanity.

Some of these List items are inside work, and some depend on decent weather to be done.  But they all go on The List.  And it is working down The List which keeps us in mental and emotional contact with our boats over the winter hiatus, and which fuels the dreams of the coming new season with romps under full sail with blue skies and shining water.


Share/Bookmark

Tuesday, October 13, 2015

Bimini Renewal - In Progress

One of the things about owning a boat for a long period of time (or ageing in general, for that matter...) is that you get to see the effects of time.  They are almost never kind.  But to avoid becoming morose, let's keep this focused on Eolian's cockpit canvas.

Way back in 2003 we had our cockpit canvas renewed by Barrett Enclosures in Seattle.  They did a masterful job.  But that was 12 years ago.  In the intervening years, I have had to redo almost all the stitching (because I made a short-sighted decision to use the somewhat less expensive "UV Stabilized" polyester thread instead of the Teflon thread), refresh the Sunbrella's waterproofing on an annual basis, and deal with slow but inevitable fabric shrinkage.  It is a sad thing to me to see the sorry state that things have reached, from such initial beauty.  So, it is  time to do that "once in a lifetime task", a second time.  New cockpit canvas is needed.

But this time, instead of investing more than 6.500, I decided to give it a try myself.  Already having a Sailrite LSZ-1 makes this a possibility.  So I reviewed Sailrite's excellent online videos, ordered a bunch of Sunbrella, fittings, and notions from Sailrite, and set to work.

After uneventfully patterning the aft bimini panel, I encountered the first problem:  There was no place on the boat large enough to lay out the pattern on the cloth.  We were able to get about 3/4 of it on the cabin top, so we did that and then folded the marked section up enough to get room to finish.  Yes, I know that this process was fraught with opportunities for errors to creep in.  But within the tolerance that we were working with (about 1/8") I think we did OK.

But there are a lot of fabric pieces involved in the aft panel.  Altogether 7 more pieces were needed, besides the obvious big one.  And then the space thing reared its head again.  Working with the LSZ-1 on the edge of the saloon table, I was able to sew the long seams by letting the completed section pass over the table and then off the far edge, on its way back to the floor.

On a project like this, fabric management is always difficult, especially when working in a limited space (tho not as big a problem as this).  My recommendation:  always, ALWAYS use  seam-stick tape, 3/8" for normal seams and 1/4" for zippers.  It is a lifesaver.  And don't be in a hurry.

This last weekend, I finally got the last of it done and installed it.  But sadly, somehow I managed to get the locations for the Common Sense fasteners for one of the aft side curtains off slightly.  Rather than make another set of holes in the new piece, I am going to relocate the eyelets in that side curtain instead.  The thinking is that the side curtain is old and will be replaced anyway at a time in the future much nearer than the just-completed panel.  And because of this, I am not going to show you a picture of it.  Yet.

The plan is to move ahead with the other roof panels in sequence - the loose center panel that connects the dodger to the bimini, and then the top panel of the dodger.  When redoing the top panel of the dodger, I will be revising Barrett's design, making the top panel and the front panel separate pieces - the thing is just too unwieldy for me to handle as a unit.  And in fact, it looks like Barrett made the roof and front of the dodger separately, and then stitched them together as a final step.  I will use Common Sense fasteners to hold them together instead of stitching.

So.  I can say at this point, nearly 1/3 done with the top of the bimini and dodger, that with Sailrite's instructional videos, their tools and their materials, this is a doable project.  It is complex and requires constant attention to detail, but it is doable by the cruising sailor, at a savings of 90% over the cost of having a professional do the work.  But don't figure on getting it done over a weekend...


Share/Bookmark

Tuesday, October 6, 2015

Narrowboats!

Astute regular readers of this blog may have noticed that nothing was posted here for the last three weeks.  To all 6 of you, I apologize.  The reason for the hiatus was that we travelled to the United Kingdom on a holiday trip.  And the title gives it away...  for one of those weeks we tooled up and down the Shropshire Union canal in our very own (rented) narrowboat:  nb Phantasy.

nb Phantasy
Ah, but I am getting ahead of myself.  Before we went out on our own, our friends Kath & Rob took us on an overnite tutorial cruise on Kath's boat, nb BobcatBobcat, at 58 feet long, is 20 feet longer than Phantasy... but still only 7 feet wide (on the outside; 6 feet wide on the inside).

nb Bobcat; inside & out
Aside from the cruise itself, Kath took us thru the etiquette of canal life and gave us a hands-on tutorial on the operation of locks.  And then after we shared a Thai dinner in Stone, they gave us their bed in the master cabin - what wonderful hosts! 

The Boat

Nb Phantasy has dimensions of 38 feet LOA and 7 feet beam, and is powered by a 3-cylinder diesel engine.  Starting from the bow, she has an open foredeck, a dinette which makes into a small double bed, a nice galley, a head, the engine area, and finally an open stern where the helmsman stands.  There is no shelter for the helmsman in inclement weather, an arrangement shared by almost all the narrowboats.  Pretty basic compared to nb Bobcat or nb Snowgoose, but we were not living aboard, just camping aboard for a week.  She worked out well for us.

Looking aft

Looking forward

The heat aboard was hot water (you can see the white flat panel radiators on the lower walls), supplied by the engine.  When the engine was not running, a very compact propane fired hot water heater and circulating pump took care of business.  I was very intrigued by this heater:


It was located in the head, smack next to the shower and was only six or seven inches wide, by about five feet tall.  I do not know how deep it ran into the wall.  It was manufactured by a Swedish company called Alde, although this appears to have been an earlier model.  In operation it was absolutely silent.

The Scenery

Just a few pictures showing what it is like on the canals...


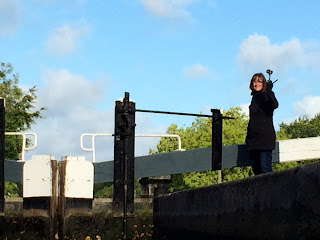
Jane, the lock master

Lessons Learned

Here are the lessons learned by this open-water sailor when transitioning to  canal boating:
  • Yup, it really is like that. This is civilized, low key boating.  Nobody is in a rush, you don't travel fast (less than 4 kt, and at "tick over" when passing moored boats - see below).  And indeed, you don't get going early or travel late.  In fact, most boats do not have running lites, and unofficial hours on the canal are 08:00 - 20:00.  We travelled only from village to village, stopping for the pubs of course.

    And like boaters everywhere, everyone was friendly - from the boats passing in the opposite direction to those we met in the pubs - like Andy and Liz of nb Snowgoose, who we met in The White Swan at Brewood and who later invited us aboard their boat when they moored up in front of us at Gnosall:
    Liz and Andy, nb Snowgoose

  • The rudders on narrowboats are unbalanced.  You really need to lean into the tiller to turn the boat.
  • As you might expect, the canals are shoal at the edges. 
  • Steering is strange near the edges - it is as if the edge is trying suck you in
  • Probably the biggest unexpected thing, and what could likely be the cause of many of the others noted here, is that the boat is large with respect to the canal.  This means that it is not operating in free water like every other boat I have ever been on.  Instead, because the boat occupies a significant portion of the cross section of the canal, it is pushing water ahead of it as it moves.  This water then flows back along the sides of the boat, making it look like you are operating in a current.
  • The passages under the bridges are almost unbelievably narrow, leaving only a few inches on either side of the boat.  The plug flow that I described above is magnified greatly when passing under a bridge, slowing the boat dramatically, and making steering almost completely ineffective until you get clear of the bridge. 
  • As you pass moored boats, they are all pushed around by the plug of water you are pushing ahead of yourself... and then sucked back the other way after you pass.  This is why it is necessary to slow down to idle when passing moored boats.
  • The canals are shallow (narrowboats rarely draw much more than 24").  And they are silted up.  As boats go by, the prop wash stirs up the silt, but since there is virtually no flow in the canal, this just settles back out, to be stirred up again by the next boat.
Would we do it again?  You bet.  The route we chose this time was constrained by a number of factors, but still had us going thru a tunnel (81 yards long), over an aqueduct, and thru a single set of locks.  And it took us to the pubs in the villages of Gnosall, Wheaton Aston and Brewood.

What would we change?  Not much.  More time would be nice.  And a few more locks would be OK too.

And a few more pubs, of course.


Share/Bookmark
Related Posts Plugin for WordPress, Blogger...