Sunday, April 23, 2023

The End of an Era

 I always knew it would be coming some day... "some day in the future", but my last spinal surgery (#5...) has me realizing that the time has come.  After 25 years, it is time to pass Eolian on to her next steward.


Eolian
Custom Downeast 45


SPECIFICATIONS
LOA: 52’
LOD: 45’
LWL: 36’
Beam: 14’
DRAFT: 5’ 6”
DISPLACEMENT: 39,000 lb
BALLAST: 12,000 lb, Internal Lead
RIG: Staysail ketch
SAIL AREA: 1100 ft2
ENGINE: Perkins 4-236 75 hp diesel, 4391 hrs
DIESEL TANKAGE: 2 x 150 gallons
WATER TANKAGE: 2 x 150 gallons
WATER MAKER: PowerSurvivor S-3500
BLACK WATER TANKAGE: 45 gallons
HULL NO: 11
COMMISSIONED: 1978
LOCATION: Cap Sante Marina, Anacortes

FOR INFORMATION Call: Lee Youngblood
West Yachts
(425) 444-9109


CONSTRUCTION
Eolian is a heavily built proper blue water cruising vessel in traditional style. The white hull is one-piece solid fiberglass and is barrier-coated, with molded-in strake lines to resemble a carvel-planked wooden hull. Her design features 6 large “picture windows” which give a light, airy interior - this concept has been recently re-introduced as the “Deck-Saloon”.

A full-length teak rub strake is applied to both sides. The underwater profile is a modified full keel, with a keel hung rudder and the propeller in an aperture in the rudder. This arrangement provides for very stable course-keeping and it sheds crab pot lines instead of catching them. The hull is barrier coated. A fiberglass hull liner is fitted which reduces interior condensation considerably in cool weather.

The keel is internal lead, enclosed within the fiberglass hull. Because it is internal, there are no keelbolts and no keel-to-hull joint, eliminating a weak point and potential leakage area present in other designs.

The deck is foam-cored heavy fiberglass with no rot-prone plywood or balsa fillers. Walking areas have a non-skid treatment. The hull and deck joint is a continuous heavy 1” thick fiberglass lap joint with through-bolted stanchions and pulpits.

All bulkheads are glassed to the hull. The primary bulkheads are doubled and trebled.
 

HARDWARE
Cast bronze hardware is used throughout, including scuppers, gudgeons, anchor chock, cranse iron, thru-hulls, seacocks, deck cleats, rigging screws, winches, and the propeller shaft gland.
 

SPARS & RIGGING
The spars are LeFiell extrusions, finished in white two-part urethane.

The main mast is the heaviest and largest extrusion offered by LeFiell: OM-5C, and is stepped on a cast aluminum fitting bolted to the keel. The single spreader rig is supported by a 3/8" stainless steel forestay, and dual 3/8” stainless steel backstays. The upper and lower shrouds are 3/8” stainless steel. Four bronze two-speed winches are provided for the main halyard, the jib halyard, the staysail halyard and a spare. Mounted on the main boom a bronze two-speed winch is provided for the mainsail outhaul and for reefing the mainsail. A Sea Furl MkII roller furling system mounts on the forestay. A 3” diameter by 12’-22’ whisker pole is included.The mizzen mast is deck stepped and is a lighter section, LeFiell OM1C. It is supported with 3/8” and 5/16” stainless steel shrouds, and a 5/16” triatic stay running from the peak of the mainmast. Running backstays are installed which can be deployed for additional downwind support in heavy conditions. A bronze two-speed winch is mounted to the mizzen mast for the mizzen halyard.

Sails include a fully battened Main (two sets of reef points), Yankee, 110% Genoa, 150% Genoa, staysail (one set of reef points), mizzen (one set of reef points), and a mizzen staysail. The two genoas, a spare mizzen, and the mizzen staysail are stored at the owner’s home. All sails are fitted with Sunbrella sail covers. The main and mizzen covers are stack-pack type and are nearly new, while the staysail cover is conventional. The roller furled Yankee is provided with a matching Sunbrella sun protection strip. This rig and sails provide for a large number of combinations to suit nearly all wind conditions, while at the same time keeping the rig balanced fore and aft.

The main sheet is reeved through teak blocks to a two- speed winch mounted on the cabin top. The staysail sheet is led to a separate two-speed winch on the cabin top. The jib sheets are led via snatch blocks on sail tracks on either side of the cockpit to large two-speed bronze winches mounted on either side of the cockpit coaming. The mizzen sheet leads thru teak turning blocks to a bronze two-speed winch on the starboard aft cockpit coaming. A second bronze two-speed winch is provided on the port aft cockpit coaming which can be used for a staysail sheet or for the jib furling line.

SAFETY
There are 8” Teak-capped bulwarks around the entire deck for safety. Wide side decks lead from the bow to the stern quarter deck, and varnished teak handrails are provided on the cabin top from bow to stern to provide safe handholds while under way. Dual lifelines run from the 1” stainless steel bowsprit pulpit down both sides of the deck to the 1” stainless steel stern pulpit. Boarding gates are provided on both sides of the boat.

Provision is made for rigging vinyl covered stainless steel jacklines, which are stored in the stern lazarette compartments; tethers are stored below decks. A Lifesling and a man-overboard pole and horseshoe buoy are located on the starboard lifelines near the stern.

A 6-man Avon inflatable liferaft (out of certification) is dogged down to the cabin top. A hand operated reverse osmosis water maker is provided in the ditch box, stored below.


ON DECK
Beginning at the bow, the bowsprit is provided with a 1” stainless steel pulpit and teak platform. It deploys a 66 lb genuine Bruce anchor over a bronze roller, with 300' of 3/8” all chain rode, stored below decks in a self-draining locker.

The bower anchor, a Danforth S-2000 is stored ready to hand in bronze chocks at the bow (we have never needed it – the Bruce is that good!). The bower is provided with 300’ of 1” nylon rode, also stored below decks. Both anchors are managed by a Simpson Lawrence electric windlass, which has an integral counter showing the length of rode deployed – there is no need to mark the rode. In 25 years, we have never drug the Bruce anchor, even with winds 35+ kt. A 12V washdown pump supplies pressurized seawater for cleaning the rode and anchor as they come aboard.

On the port side, permanently attached tubular boarding steps are mounted to the hull going down to the waterline, making boarding from a dinghy easy and straightforward.

Deck lighting is supplied by two sealed beam lights on the main spreaders and a single sealed beam light on the mizzen spreader. The mizzen light is arranged to provide light for night use of the Dickenson propane-fired barbecue mounted on the stern pulpit. The two non-corroding aluminum 20 lb propane tanks on the center stern of the quarterdeck provide propane for both the barbecue and for the galley. A solenoid operated propane valve is located near the tanks. The barbecue,  propane tanks and solenoid valve are provided with Sunbrella weather covers.

Two lazarette compartments are located beneath the quarterdeck. In these will be found extra dock lines, a multitude of spare lines of all sizes, crab pot lines and floats, a reel of floating line for stern tying (common in Canada), a soft bucket, washdown hoses, etc.

An anchor roller is mounted on the port aft corner of the bulwark, which serves the stern anchor, a Danforth S-1600 and nylon rode, stored in the stbd quarterdeck lazarette.

A Scanmar windvane steering system which uses an auxiliary trim tab on the main rudder to provide steering by the wind without electrical consumption is mounted at the stern.

Finally, stainless steel dinghy davits are mounted on the quarterdeck at the very stern.
 

COCKPIT
The cockpit is fully enclosed with a Sunbrella and Strataglass enclosure supported on 1” stainless steel tubing, and is provided with foam cushions. When the cockpit is closed up, it is very comfortable if the sun is shining, even when the temperature drops below 50°. The steering pedestal houses the engine controls and is equipped with a bright finished wood wheel with bronze fittings. It also houses the large brass compass binnacle containing the large Richie helm compass. A new approved marine fire extinguisher is mounted to the pedestal.

From behind the wheel and to the right are the Garmin chart plotter and the Ratheon radar display. Ahead on the aft surface of the cabin are located the wind speed/direction, and primary depth and speed/log instruments. Low and to the right is located a control panel housing the engine instruments and the switches for navigation lighting, fuel gauge selector switch, spreader lighting switches, and the engine ignition switch. The AIS receiver is hidden in one of the coaming compartments.

The cockpit is provided with a removable Teak table which mounts to the binnacle. When not in use, this is stored below behind the companionway stairs. Provision is made to store the wheel on the port cockpit enclosure framework in order to give more space in the cockpit for entertaining.
 

MACHINERY
A Perkins 4-236, 75 HP fresh water cooled marine diesel engine drives a three-blade 20x14” bronze propeller through a water cooled Borg Warner Velvet Drive 71C 1.9:1 transmission. The 1- 1/4” prop shaft is provided with a shaft lock to minimize drag. The original prop shaft packing has been replaced with a Teflon packing that runs cool and almost completely dry.

In addition to the fuel filter on the engine, a pair of Racor 90 water separator/filters is mounted in parallel, so that filters can be switched while underway without shutting down the engine. In addition, an electric fuel transfer pump is provided which can be used to move fuel between tanks, or for priming the engine should prime be lost. A bronze raw water filter supplies cooling water to the engine from a bronze external hull strainer.

On the engine itself, the original cast iron exhaust manifold has been replaced with a custom 316 stainless one. The original heat exchanger has been replaced with a monel heat exchanger, and the exhaust elbow and exhaust hose have all been renewed. The alternator has been replaced with a self-exciting one. The raw water pump cover has been replaced with a SpeedSeal cover that is o-ring sealed and does not require tools for removal. Finally, the original Perkins expansion tank was removed because it was not the high point in the system (the engine-heated water heater is), and has been replaced with an external expansion tank. The original installation had any air in the system accumulating in the water heater, where it impeded heat transfer to the water.

The oil has been changed religiously once a year, about every 100 hours, or less. In the fall of 2022 the valve cover was removed to check valve clearances (no adjustments were needed) - the engine interior looks new. The engine usually starts on the first revolution and does not smoke, burn oil, or leak.

ELECTRICAL
Eolian has four electrical systems, all managed thru a large breaker panel located under the navigation station:

  • 30 amp 120V shore power
    A 30 amp shore power inlet fitting is located on the port aft side of the cockpit coaming. This is fed from the shore power pedestal with 2-50’ 30 amp shore power cables, and feeds the main panel thru a galvanic isolator. Many 120V GFCI protected receptacles are located throughout the interior.
  • 30 amp 120V generator power
    A 4 kW Kohler diesel generator supplies all needed power when away from the dock. The generator engine is a Yanmar 2GMF fresh water cooled diesel.
  • A Freedom 20 2 kW inverter/charger supplies 20 amps of absolutely silent 120V power from the battery bank, as well as serving as the 100 amp battery charger when supplied with 120V, either from shore power or the onboard generator. A Link2000 inverter control and battery state panel is located close to the main power panel. Switching is completely automatic.
  • 12V power
    Onboard 12V power storage is provided by 6 group 31, 115 amp-hr deep discharge lead acid 12V batteries, arranged in two banks of three. Power usage, amp draw, voltage and charge state of these battery banks are monitored thru the inverter control panel. For normal usage, the banks are kept separate, with one bank supplying onboard 12V needs, and the other bank supplying the inverter. For engine starting or charging, the banks are combined thru a battery switch on the main breaker panel. A separate battery is reserved for starting the generator and for the anchor windless. It is charged by the generator when offshore, and via the inverter/charger when on shore power using a separate battery switch.


INSTRUMENTATION

  • West Marine vhf500dsc VHF, located just inside the companionway to protect it from weather. The antenna is located at the very top of the main mast, 65’ above the water.
  • Wireless rechargeable Uniden remote speaker/mic which can be located close to or on the helmsperson, avoiding the need for everyone in the cockpit to hear all the radio traffic.
  • AIS receiver, located in one of the cockpit coaming compartments. The AIS antenna is at the top of the mizzen mast.
  • Ratheon RL9 20 mile radar, antenna located on the mizzen mast and display on the cockpit coaming to the right of the helm.
  • Garmin GPS-520 chart plotter/gps, on the cockpit coaming to the right of the helm.
  • Raymarine ST5000 autopilot, driving a very heavy duty Benmar actuator
  • ST1000 secondary tiller autopilot which is arranged to be able to drive the windvane trim tab. The ST1000 is provided with a hand-held remote which can be connected on deck or at the Navigation station.
  • Standard Horizon SL-45 digital speed/log, on the aft face of the cabin.
  • Standard Horizon DS-45 digital depth sounder, on the aft face of the cabin.
  • Standard Horizon WS-1 analog/digital wind speed/direction, on the aft face of the cabin.
  • Ritchie Helm compass
  • Secondary compass, at the Navigation station. • Secondary depth – Morrow S-60 flasher type, at the Navigation station. This was retained because it displays different information than the digital sounder. For example, it can show the presence of a halocline which would cause the digital sounder to give a false reading.
  • Standard Horizon DS-10 secondary speed/log, at the Navigation station.
  • Kenwood TS-440S Ham transceiver, at the Navigation station. This radio is coupled to an insulated backstay as an antenna. If the next owner has a General class (or above) amateur radio license, this will be left intact. If not, the microphone will be removed to prevent illegal transmit, but retaining operation of the 0.15 MHz to 30 MHz general coverage receiver,
  • Engine instrumentation at the cockpit panel: Engine temp, oil press including an oil pressure loss alarm, charge/discharge amps, rpm, fuel gauge which can be directed to read either tank. 
The GPS/chartplotter, AIS receiver, VHF, radar, and autopilot are all networked via NMEA 0183 so that the VHF can broadcast emergency messages which include an accurate position at the press of a button, the autopilot can follow a route rather than just maintain a direction, current navigation data and a graphical depiction of the next waypoint are shown on the radar display, and the AIS positions of nearby vessels are shown on the chartplotter, complete with collision warnings and predicted time and position of closest approach.


ENVIRONMENTAL COMFORT
Eolian is equipped with a 16,000 BTU heat pump which provides primary heating and air conditioning, with outlets throughout the boat. The heat pump uses sea water as the heat source/sink. She also has a bulkhead mounted Dickenson diesel heater which has a large circulating fan to prevent heat building up only in the area of the heater. Finally, a Red Dot heater located beneath the raised dinette sole provides fan-driven hot air extracted from the engine cooling water.
 

INTERIOR
The layout was custom designed with the builder by the original owner, and differs from her sisterships in many details. All joinery is solid 3⁄4" Teak and 3⁄4” Teak plywood. The cabin sole is heavily bright varnished traditional Teak and holly (shoes off please!), with access panels to the bilge. Grey granite Formica is used on the galley and various counter tops. Most interior cabinetry is provided with automatic lighting. The entire interior was reupholstered with heavy duty upholstery fabric in 1999. Headroom is 6'-5" throughout the interior.

All head plumbing aboard has been replaced with PVC hard piping, which will never permeate with head odors (just like the plumbing in your house). The only rubber sanitation hose in Eolian are short pieces of the most expensive hose available (currently $22/foot) making connections to the rigid PVC to provide vibration isolation. This has completely eliminated head odors. A spare length of hose is provided. The holding tank vent line is provided with an activated carbon filter to reduce odors from that source.

The original aluminum holding tank (which had corroded to the point of leakage) was replaced with a 45 gallon roto-molded polypropylene tank and is provided with a deck pump out fitting and additionally a manual pump which can empty the tank when in waters where such discharge is permitted.


FORWARD CABIN
In the very forward part of the forward cabin are the access doors to the dual chain lockers.

The forward cabin is isolated by a louvered door. Its 6'-6" vee-berth has a custom upholstered mattress and is supplied with two brass reading lights port and stbd, two hanging lockers enclosed by louvered doors port and starboard, 6 drawers, a huge storage area beneath the mattress cushions, another storage area beneath the berth accessed via a door, and 3 enclosed cabinets, one with a mirror. For ventilation there is a large 22” square opening hatch (screen provided) located in the deck directly above the berth, and two Beckson 7”x14” opening ports (with curtains, screens and storm windows) on either side of the cabin house. There is a new approved marine fire extinguisher located on the aft bulkhead.


FORWARD HEAD
Just aft of the Forward Cabin and to port and accessed by a door, is the spacious Forward Head compartment. A second louvered door opens into the main portion of the interior so that this head serves both the Saloon and the Forward Cabin. The marine toilet is a manual Jabsco Twist Lock, with plumbing arranged to permit effluent flow overboard or to the holding tank through a wye valve. The stainless steel sink has hot and cold pressurized water, as does "telephone" style shower fixture. The shower is provided with a curtain and a teak grating in the sole. A hanging locker and a toiletry cabinet are built in and commodious storage is behind louvered doors under the sink. A mirror is mounted on the aft bulkhead. Ventilation is provided by another Beckson 7”x14” opening port (with curtain, screen and storm window).

OFFICE
Aft of the Forward Cabin and across from the Forward Head to stbd is located one of the unique features of Eolian, the Office, open to the Saloon. The Office is provided with a desk with pencil drawer, a mounted chair and spacious shelving for books, etc. There are also 3 cabinets enclosed by louvered doors.  The office has both a large reading lamp and a red 12V fluorescent lamp. Ventilation is provided by another Beckson 7”x14” opening port (with curtain, screen and storm window).
 

SALOON
Aft of the Forward Head and the Office is the Saloon, occupying the full 14’ beam. The Saloon is served by 6 large 18”x36” non-opening picture windows which eliminate the “cave” feel of many boats, and make for a light, airy interior, perfect for a live aboard.

Above, overhead handrails provide safety under way, and valences port and stbd conceal warm white LED overhead lighting. Main lighting is provided by 3 overhead lighting fixtures and a brass trawler-style kerosene lamp hanging above the table.

To starboard, is a 6' 3” settee/pull-out berth, with a hidden lee cloth. The back support for the settee conceals storage spaces, and above the settee are more louvered doors concealing an AM/FM radio/CD stereo, DVD player, and stained glass doors conceal the liquor locker. Also located in the area is a flat screen TV. Above the settee on the forward bulkhead are a brass Weems barometer and a chronometer. On the aft settee bulkhead is a magazine rack. Reading lights are installed at either end of the settee. More storage will be found under the settee – this is where tools, Christmas lights and the bosun’s seat and climbing gear for ascending a halyard will be found.

To port is a raised dinette with a Teak table with seating for 4. Because it is raised, eating is delightful with the view out the picture windows. 

On the forward bulkhead of the table area is a numbered watercolor gliceƩ of Gig Harbor, which will stay with Eolian.

More storage is behind the table seating backrests. Under the table seating will be found the heat pump installation, the 6 gallon hot water heater (heated by either/both 120V or cooling water from the engine), the inverter, and a vacuum cleaner which is provided with sufficient hose to reach throughout Eolian.

Located below the raised table sole are two drawers and the Red Dot heater.

Ventilation in the Saloon is provided by a 16” butterfly hatch in the overhead and a Beckson 7”x14” opening port (with curtain, screen and storm window).
 

NAVIGATION STATION
Aft of the Saloon and to port is the Navigation Station, open to the Saloon. The navigation Station is raised so that there is easy viewing out the picture windows when seated. Within the Navigation station is the chart table, containing paper charts and ship’s documentation, owner’s manuals, etc. The secondary compass, secondary knotmeter/log, and the ham radio are also within easy reach. In the footwell will be found the battery switches and the generator start battery monitor gauge. The main electrical panel is located on the pedestal supporting the chart table. On the aft bulkhead are the hand control for the ST1000 autopilot, the secondary depth sounder, and the (formerly required for boats of this size) brass bell.

There is storage under the Navigation station seat, under the (raised) footwell sole, and there are two drawers in the table support pedestal, below the main electrical panel.

Lighting is provided by an overhead light and a reading light fitted with a red bulb.
 

COMPANIONWAY
Between the Navigation Station and the Galley is the Companionway. Here will be found the stairs leading to the cockpit, a Halon fire extinguisher, the prop shaft lock, the three switch panels for the three bilge pumps, the engine hour gauge, and a gauge which shows the vacuum found in the fuel line supplying the engine lift pump. This gauge can be monitored to show the state of the upstream Racor fuel
filters.

The companionway hatch is supplied with Teak wash boards and a clever custom door with a large Plexiglass window that swings down from the sliding companionway hatch when the wash boards are not fitted. This allows for the companionway to be sealed off but yet allows for light to reach the Saloon, Galley and Navigation Station. The Teak cockpit table is stored behind the stairs.


GALLEY
Aft of the Saloon to stbd and open to the Saloon is the Galley. It is L-shaped with the sinks near the centerline, meaning that they will drain even when on a port tack. A cutting board which fits the sink is provided.

Next aft is a gimbaled propane 3 burner Princess oven/stove. The propane solenoid switch is located nearby, above the refrigerator. Below the stove is the microwave. 

Refrigeration aboard Eolian is provided by a 12V seawater cooled compressor located beneath the galley. The very large refrigerator is just aft of the stove/oven, and has Teak shelving and a holding plate. Between the sink and the stove is the separate large freezer compartment, equipped with two holding plates.

Two foot pumps are provided at the base of the sink cabinet for the fresh water and sea water spigots at the sink. 

Four drawers are provided for flatware and cutlery, there is a large storage area beneath the sink, there is storage over the sink for mugs, bowls, etc and there is a wine glass rack with a clever magnetic catch which retains the glasses in a seaway. In the rack are 6 stainless steel wine glasses. 

Above the refrigeration compartment is a spice storage cabinet and to hand to port is a pantry cabinet, which conceals a ships stores area behind. 

Lighting in the galley is provided by an overhead light and task light over the sink.

OWNER’S CABIN
In the stern is the Owner’s Cabin, with ensuite head. A near full-width king size berth has storage to each side. A vanity with lighting and swing-out stool and drawer is to stbd. Two cedar-lined hanging lockers and four large drawers complete the storage. The cabin is provided with two overhead lights and two reading lamps. Incredible ventilation is provided by four Beckson 7”x14” opening ports (with curtains, screens and storm windows), and a large hatch in the overhead. 

The head is separated with a door and houses the sink, Jabsco manual Twist-Lock head and the shower. The shower is provided with a telephone-style shower head, a curtain, and a Teak floor grate. There is storage behind the sink, under the sink and behind the head. A full-length mirror is provided. This is where the dehumidifier is located.

BILGES
The bilge is equipped with three bilge pumps, located at three different heights. The primary pump is a 3000 gph Rule pump, and is the lowest. Next is a 300 gph Rule pump, equipped with an alarm. Finally, a third Rule 300 gph pump is located highest of all. All three pumps are equipped with float switches and are controlled via a panel at the Companionway.
 

DINGHY
An Achilles 11’ inflatable fiberglass RIB hangs from the dinghy davits. The dinghy is equipped with an air-cooled (no water impeller to worry about) 3 HP Tanaka outboard.  Though it has no gearshift (the motor is turned around for reverse operation), it has a centrifugal clutch which means it can be started without the dinghy lurching forward. A bilge pump is located under its seat, and a foot inflation pump for the dinghy is located in the cockpit coaming.
 

INCIDENTALS
Dishes and flatware for 6 are provided, as are pots, pans, skillets, coffee mugs, glasses and miscellaneous bowls.  Some kitchen appliances will go with Eolian, including an electric coffee grinder, food processor, espresso maker, and a hand-held electric mixer.

Life vests, hoses, crab pots, a wetsuit, a bosun’s chair and climbing gear, a Loos PT-3 rig tension gauge, bronze boat hook, sextant, books, vacuum, TV, stereo, DVD player, documentation, tools, and an extensive spare parts inventory, and more will all go with Eolian.

REMARKS
Eolian is in excellent condition, having gone through a full refit 1997-2009. Since then she has had loving care and continuous detailed maintenance by the owners. When at anchor, Eolian is frequently cruised by other boats and offered compliments. Those who have been aboard have frequently commented on her spacious interior. Her capacities are such that the current owners have made four week voyages without putting in for fuel, water, or any kind of provisions. She is a capable blue water cruiser, sails well and makes a comfortable live-aboard.


Share/Bookmark

Friday, January 27, 2023

Revolutionary Propeller Design


I have talked about propellers and propeller design before, here and here.  In fact I proposed a new propeller design with a circular rim, but this revolutionary design  takes it a huge step further.  

Called a 'toroidal propeller', this design claims to eliminate tip vortices, consequently delivering a 20% increase in efficiency, and a huge decrease in noise.  Tho the article seems to be more focused on the application of the design to drone propellers (because drones and quadracopters are new, hip, and cool), it does mention marine applications.

And speaking of marine applications, when you are below decks and a boat passes by, you are certain to hear him - his prop makes a lot of noise in the water, and it is conveyed to your hull where you hear it.  Submarines have spent fortunes trying to eliminate prop noise because this noise carries a long way in the water and frustrates stealthy operation.  Expect these props to be refitted to all current and new submarines.

For now, if you want one for your boat, expect to pay approximately 10X the cost of a conventional prop, but this cost should come down significantly over the next few years, as the design gets adopted widely.


Share/Bookmark

Wednesday, July 13, 2022

Bullet-proof? Not hardly


Not even finger-proof

Well, now I have the answer.  

Remember way back, when I discussed Lexan vs. Plexiglass and postulated that polycarbonate (trade name: Lexan) would lose its properties when exposed to the sun over time? 

Well here is one of my polycarbonate storm windows, after 6 years exposure only in the winter, on the sunny side of Eolian in her slip.  I literally put my finger thru it when gently lifting it out of the slot today.  It is as fragile as a dry, dead leaf.  So much for 'bullet proof'!  And further, please look closely and note how the polycarbonate has crazed and browned up nicely where the port gasket did not protect it from the sun.

If you are changing/installing ports or hatches on your boat, specify acrylic (trade name: Plexiglass) instead of polycarbonate!  This is most important on hatches, where the possibility of someone standing on the hatch makes the choice of material a safety issue.

(One of the benefits of owning the same boat over a long time is the ability to do longitudinal studies like this.)


Share/Bookmark

Thursday, June 16, 2022

Back on the Dock

Well, here we are back on the dock in Anacortes.

The  last few days were great.  The forcasted blow did indeed come, but in Blind Bay, where the anchor loves the bottom and with 100' of 3/8" chain out in 25' of water, we were more than secure and slept soundly.

There were no more sunset moments from Blind Bay (view to the west is obscured by the protecting ramparts of the island), but it was wonderfully quiet.  Most of the boats in the bay were doing what we were doing... peacefully spending days in the Islands at anchor.  A few left and a few came in, but the balance stayed at about 10  transient boats - far below the ridiculous total of 51 boats at the height of the COVID Canadian border closure.

I puttered around working on the inevitable boat problems, an overhead light that had quit working, water pump that seemed to be continuously inhaling air, etc.  But mostly we read books on our Kindles.

And a joy...  with my phone acting as a hotspot, we were able to stream videos from Roku at anchor, so that took care of the evenings, in spades.  What a luxury!

So this afternoon we are back at the dock in Anacortes, cleaning up the boat and restocking it for the next adventure... Jane just arrived with a huge batch of groceries for that next outing - I need to go help her get them aboard and stowed... and then to make the bed...


Share/Bookmark

Sunday, June 12, 2022

Finally!

This has been the coldest, wettest spring in decades here in the PNW.  There has been absolutely no incentive to go out and sit in the cold rain.

Until now.

We are finally (!) off the dock, anchored out in the San Juan Islands in our favorite anchorage: Blind Bay.  But lest you think the rains had stopped... no.  One of our days out here (day 3) was spent at anchor, listening to the rain pelt down on the deck... for 24 straight, relentless hours.  But that day was bookended by two wonderful sunny days (2, and 4), so it was OK...  we stayed below and read, and cooked.  Speaking of cooking...  over the years our time on the water has been favored with increasingly great meals!  I'm glad our onboard scale has a dead battery.

On day 4, we hoisted anchor...  but wait.  There's a story there too.  Part of our prep for leaving the dock is to run the anchor windlass, to make sure the relay contacts or commutator haven't corroded up over the winter.  We've had to hoist the anchor (66 lb Bruce, 300' 3/8" chain) by hand, once.  And we intend for that to never happen again, thus the test run.  Now, our windlass has a counter on it that shows how many feet of chain have been let out.  When I tested it, I just lifted the chain off the wildcat, meaning that the counter showed chain overboard even tho there wasn't any.  And I forgot to reset the counter at the end of the test.  So, when Jane put the anchor down in Blind Bay the first time, she was baffled by the counter reading.  She was pretty sure that she had put down more than 100', but the counter only showed 25'.  So we put down more, just to be safe.  Hoisting and flaking all that chain into the chain locker was quite the chore...  hopefully that will be one of those lessons that will stick.

Experience is the best teacher,
but she gives the lesson after the test.

So, continuing with day 4, we hoisted anchor and went to Parks Bay on the south side of Shaw Island.  We call this bay "Sunset Bay" for obvious reasons:

We spent two idyllic days in Parks Bay, but the holding there isn't as ideal as it is in Blind Bay, being that it shoals steeply going to the back of the harbor, and to add to the fun, there are a number of abandoned pilings on the bottom in part of the ideal anchorage.  Meaning that Parks Bay is a great place to visit, but not one in which to weather a blow.

So, this morning we hoisted anchor again (just the intended amount...) and moved back to Blind Bay in anticipation of tonight's blow.  Rain and wind (16-22 kt) are expected tonight, and Blind Bay's gently sloping hard mud bottom is ideal holding for our Bruce.

We'll check in again later.


Share/Bookmark

Monday, May 16, 2022

Maintenance Spring Continues

It seems that every time we have come to the boat this spring, something has required attention.  When we arrived this past Saturday, yet another maintenance item reared its head.  When I turned on the power to the fresh water pressure pump, we were greeted with the sound of... nothing.  No water pressure.

A little bit of diagnostics disclosed that the pump was ok, but the pressure switch was not.  

Since it is nearly impossible to remove the pressure switch assembly with the pump installed without dropping important bits into the bilge, it had to come out.  Now that sounds somewhat trivial, but it is not.  Advanced Class IV boat yoga is required to get a screwdriver on the mounting screws, and the water connections are even worse.

Once removed, I disassembled the pump head and pressure switch assembly.  Delving into the switch assembly, I discovered that the micro switch which actually controls the power feed to the pump had failed mechanically.

The micro switch, shown with a thumbdrive for scale

Since we had a spare pump head aboard, I "simply" installed it and reinstalled the pump, thinking that I'd look at getting another micro switch and repairing the old pump head to keep as a spare.

Ha!

The brand new pump head would not move water.  I presume this was due to the internal flapper valves having taken a set.  It took me 3 more install/removals of the pump to confirm that the new head was not going to work.  I really dislike when new stuff fails to work out of the box.

So for the fourth time I removed the pump, and reinstalled the old pump head but with the pressure switch from the new head.

It worked.  But the pump shuts off almost immediately, telling me that I reassembled the pressure switch incorrectly (I think I know what's wrong).  

So, I took an Ibuprofin and ordered a couple new micro switches via Amazon.  I will rebuild the old pressure switch next weekend. And then I will have to employ the advanced boat yoga one more time (hopefully...) to reinstall the rebuilt pressure switch assembly.  

Then all I will have remaining is to recalibrate the pressure switch so that the pump delivers the desired pressure.  That will only require Class III boat yoga.

Hopefully.


Share/Bookmark

Saturday, May 7, 2022

Valves, Oh My!

Eolian's two valves which select which water tank the domestic supply is drawn from have been getting more and more difficult to turn over the years.  This spring, I decided that enough was enough...  before I broke something.  They were bronze valves, and were as old as the boat.

Here's the plumbing tree.  Water supply from the two tanks is at the top left and right.  Feed to the pressure pump is from the strainer at the very bottom.  The small pipe leading off to the left is the supply from the water maker, and the capped off grey pipe is the supply to the fresh water foot pump in the galley sink.

Before  


So, in a fit of activity, I disassembled the valve tree and replaced the old valves with PVC/Teflon ball valves - they are only a little longer than the old ones and there is plenty of room for them.  Also, they open and close like a dream because the seats are Teflon.

And while I was at it, I added a valve in the galley foot pump supply and reconnected it.  (I capped this off back in 1997 because the foot pump flapper valves slowly leaked air back into the system, making the freshwater supply pump constantly cavitate.)  Now we can have the use of the foot pump by simply opening a valve.

After 


Finally as a side note, I do not leave both tanks connected together because by keeping them separate, in the event of a leak the worst case scenario is that I would only lose half of my fresh water.  (I keep both diesel tanks separate for the same reason.)


Share/Bookmark

Friday, April 22, 2022

No-no Will Be Corrected

 You probably can't tell from the photo, but that is a no-no.

You see, thru-hulls are threaded NPS (National Pipethread,Straight), so that seacocks can be threaded onto them tight against the hull, regardless of the hull thickness.  Normal pipe fittings are NPT (National Pipethread, Tapered) so the connection will bind up solidly when things are tightened up.


In the picture, you see a bronze NPT ball valve threaded onto a NPS thru hull.  This is not good, since the connection between the straight and tapered threads will only be one or two turns.  It could leak (it's not, thankfully) and it is mechanically very weak, meaning a small side thrust could disengage the threads.

This problem exists here because, tho there are 1/2" thru hulls, there are no 1/2" seacocks made - the smallest is 3/4".  So here, a normal 1/2" bronze NPT ball valve  was screwed on to the 1/2" thru hull to make up the connection.  A definite no-no.

I have thought about this off and on for years.  And recently a cosmic ray passed thru my brain and gave me the solution...

I have in my shop at home a set of pipe threading dies.  I could easily re-thread the top of the thru hull to be NPT using one of these...

So: next haul-out when the fitting is out of the water, I will bring the 1/2" NPT die to the boat and re-thread the end of the fitting to NPT, and reassemble properly.  

Problem solved!


Share/Bookmark

Wednesday, March 9, 2022

Maintenance Spring

 No, not spring maintenance, maintenance spring.

It started back in November when one day, when we boarded the boat, the primary bilge pump was running.  Huh.  After a long afternoon of troubleshooting, I was unable to find anything wrong, so I put everything back together.  Weeks later it happened again.  I finally concluded that it had to be the float switch, even tho it seemed to check out OK.  I installed a spare that I had on board, and that took care of that.

Next, we found that the refrigeration system was not running.  Thankfully there was nothing important in either the refrigerator or the freezer.  Eolian's refrigeration uses a belt-driven compressor, powered by a 1/2 hp 12V motor.  That motor had given up the ghost.

Now, in 1978, the motor had quit similarly.  At that time, Eolian was moored at the south end of Lake Union, right in downtown Seattle.  Back then, before the huge influx of cash from Amazon et. al. gentrified the whole area, I pulled the motor and walked it to a rebuild shop that was conveniently located near the marina.  Now however, I had a great difficulty in finding a rebuild shop.  I finally settled on a local automotive parts store who claimed to have a "relationship" with a major rebuilder down in Seattle somewhere.  I dropped off the motor.  Weeks later, having heard nothing, I called and was told that it would cost more than $700 because "...there were several small things inside that were no longer available and would have to be constructed from scratch by skilled machinists."  This not being my first rodeo, I recognized bulls**t when I heard it, and asked for the motor to be returned.  When I finally got it (another long delay), I tore it down and found a badly scored commutator and completely worn out brushes.  The bearings were pristine.  I also noted that no-one had actually disassembled the motor, despite the diagnosis I had been given.

So I ordered some brushes off of eBay for $6 and built a jig to turn the commutator, using an electric drill and a file.  I don't believe that the scoring was the result of wearing out the brushes.  Instead I think it was from that original rebuild way back when.  


Home made commutator turning jig

Before and after

After reassembly and re-installation in the boat, it worked great!  But...

While checking out the installation, I discovered that the Freon charge in the system was awfully low.  Getting that next maintenance item rectified was the subject of a prior post.  Been counting?  This made the third major maintenance item.

Finally, while topping off the water in the batteries, I discovered that the exhaust hose leading from the generator to its water-lift muffler had a big bubble on it and was leaking.  So, a trip to West Marine to get hose and a tube of silicone (has anyone noticed that the silicone manufacturers seem to have colluded to stop producing resealable packaging for silicone??!?). 

Installing the hose will happen this coming weekend, presuming that something else doesn't fail before then...

And to think that I was seeing this spring as an easy one...


Share/Bookmark

Wednesday, February 9, 2022

Frostline Marine Refrigeration


It seems that we are always ready to complain when a business fails to meet our expectations in some way.  But then we are silent when things go perfectly...  well this is one of those perfect cases.

Over the years (23?...) since Eolian's last refrigeration service, things worked well...  until the last year or so, when the refrigeration compressor would start, run for a few seconds, shut off, and lather rinse repeat.  Eventually tho, it would come on and run until it reached the setpoint.  I guessed that the refrigerant level had become so low that when the compressor kicked on, it would rapidly pull the suction side of the system down to the cutout pressure, and that this would continue until the entire system became warm enough to raise the refrigerant temperature to the point where its vapor pressure was above the cutout pressure.  So, after all those years, it was time for a recharge.

I tried to find someone in the Anacortes area, but no one was willing to take on additional work.

Looking further afield, I contacted Frostline Marine Refrigeration in Bellingham.

What a pleasant surprise!

Mclean was courteous and scheduled an appointment at our convenience.

When he arrived, he was prompt, fully equipped, familiar with marine refrigeration systems (quite different from domestic or industrial systems - not least because marine systems are so often crammed into almost inaccessible spaces), working on boats (protect varnish surfaces!), and most importantly, knowledgeable of refrigeration in general (I have two degrees in Chemical Engineering - trust me, I know).

He pumped the system down, removing the remaining R-409a (which was the replacement for the old R-12 back 23 years ago) and refilled the system with the newest and greatest R-12 replacement: R-417c.  And he was gone in 45 minutes.

If you have marine refrigeration needs, I cannot recommend Mclean and Frostline highly enough.


Share/Bookmark

Friday, January 28, 2022

Perkins 4-236 Shop Manual


The Perkins 4-236 is one of those small diesel engines that seemingly got adopted for every use under the sun.  One of those uses was in boats, and Eolian has one.

Because I like to have documentation on Eolian's important bits, I wanted the shop manual for this engine, and thanks to the courtesy of Martyn Lancing of Lancing Marine in the UK, I now have one.

If you would like a copy, provide me with your email address via a comment or at the email address in the Contact page of this blog.  The shop manual is a PDF document and is 15 MB in size, so be certain that your email provider will handle a message that large.


Share/Bookmark

Friday, January 21, 2022

Turn, Turn, Turn

Back in 1998, when I was spending my first summer living aboard Eolian, the 12V electric motor which powers the refrigeration system failed.  Back then, 23 years ago, I pulled the motor and walked up into the South Lake Union area to a motor rebuild shop.  A day later, I had the rebuilt motor back in hand and reinstalled it.

Fast forward those 23 years, and the motor has again failed - the brushes have worn out.  But now we are berthed in Anacortes where there are no motor rebuild shops, and the South Lake Union area is now all expensive high-rise apartments and businesses.

So this time, I decided to do the work myself.   First, I found that the bearings are in great shape - it is only the brushes need replacing.   Well, that and the commutator needs to be cleaned up.

(Quick lesson here for those not familiar with the internals of a DC electric motor.  The armature - the spinny part - has on one end a device called the commutator.  This is a series of pairs of copper bars, with the members of each pair on opposite sides of the armature.  Each pair member bar is the termination of one end of a coil of wire which, when powered, makes an electromagnet.  Things are arranged such that when the brushes contact the pair of bars and the magnet is powered up, it is just outside the field magnet and is strongly attracted to it.  But just as it gets there, the brushes break contact with that coil and make contact with the next one, via the next pair of bars on the commutator.  Thus the armature spins.)

Inspecting the commutator, it was obvious that it had seen arcing once the brushes had worn so short that they were not making good contact anymore.  But even more importantly, that motor repair shop which did the previous repair had done a very sloppy job of turning down the commutator.  First, they cut a trench that was just wide enough to accommodate the brushes, thus ensuring that if there was any play in the brush holder, the brushes would contact the edges of the trench and wear prematurely.  Second, they left a series of deep grooves in the commutator.  Now one might say, "Well, the brush will just wear to fit the contour of the commutator, grooves and all."  But again, if there is any play in the brush holder, then movement of the brush will defeat that reasoning, resulting in rapid brush wear.

So, OK - on to the repair.

I constructed a jig that would support the armature on its bearings, and connected an electric drill to the armature shaft.  This way, I could spin the armature while holding a file against the commutator, smoothing it out.  A lathe would have been much faster, but I don't have one.


It worked well, albeit slowly.  First I cut off the outboard wall on the commutator, making it all the same diameter.  (I couldn't do this at the inboard end, because this is where the wires are connected.)  Then I filed the rest of the surface smooth, and followed with 100, 220 and finally 440 grit sandpaper.


Before and After

I think it came out great!  (In the before picture I had already done some cleanup.)

I couldn't find brushes of the correct size, so I bought some that were too big and ground them down to fit.  This was an easy job, but messy since they are made out of graphite, which ends up going everywhere.

I checked the bearings (they are sealed bearings); they are in perfect condition.

The motor is now re-installed, and we have refrigeration once again.  And all that refrigeration downtime gave me a perfect opportunity to clean the interior of the refrigerator and freezer compartments - so bonus!


Share/Bookmark

Saturday, December 11, 2021

Christmas!

...and just like that, Eolian is decorated!


Merry Christmas!


 As in the last couple of years, we aren't going to decorate the outside - the winter storms out here at the far end of D-dock are just too destructive.


Share/Bookmark

Friday, December 3, 2021

Sea Hood: A Little More Canvas Work

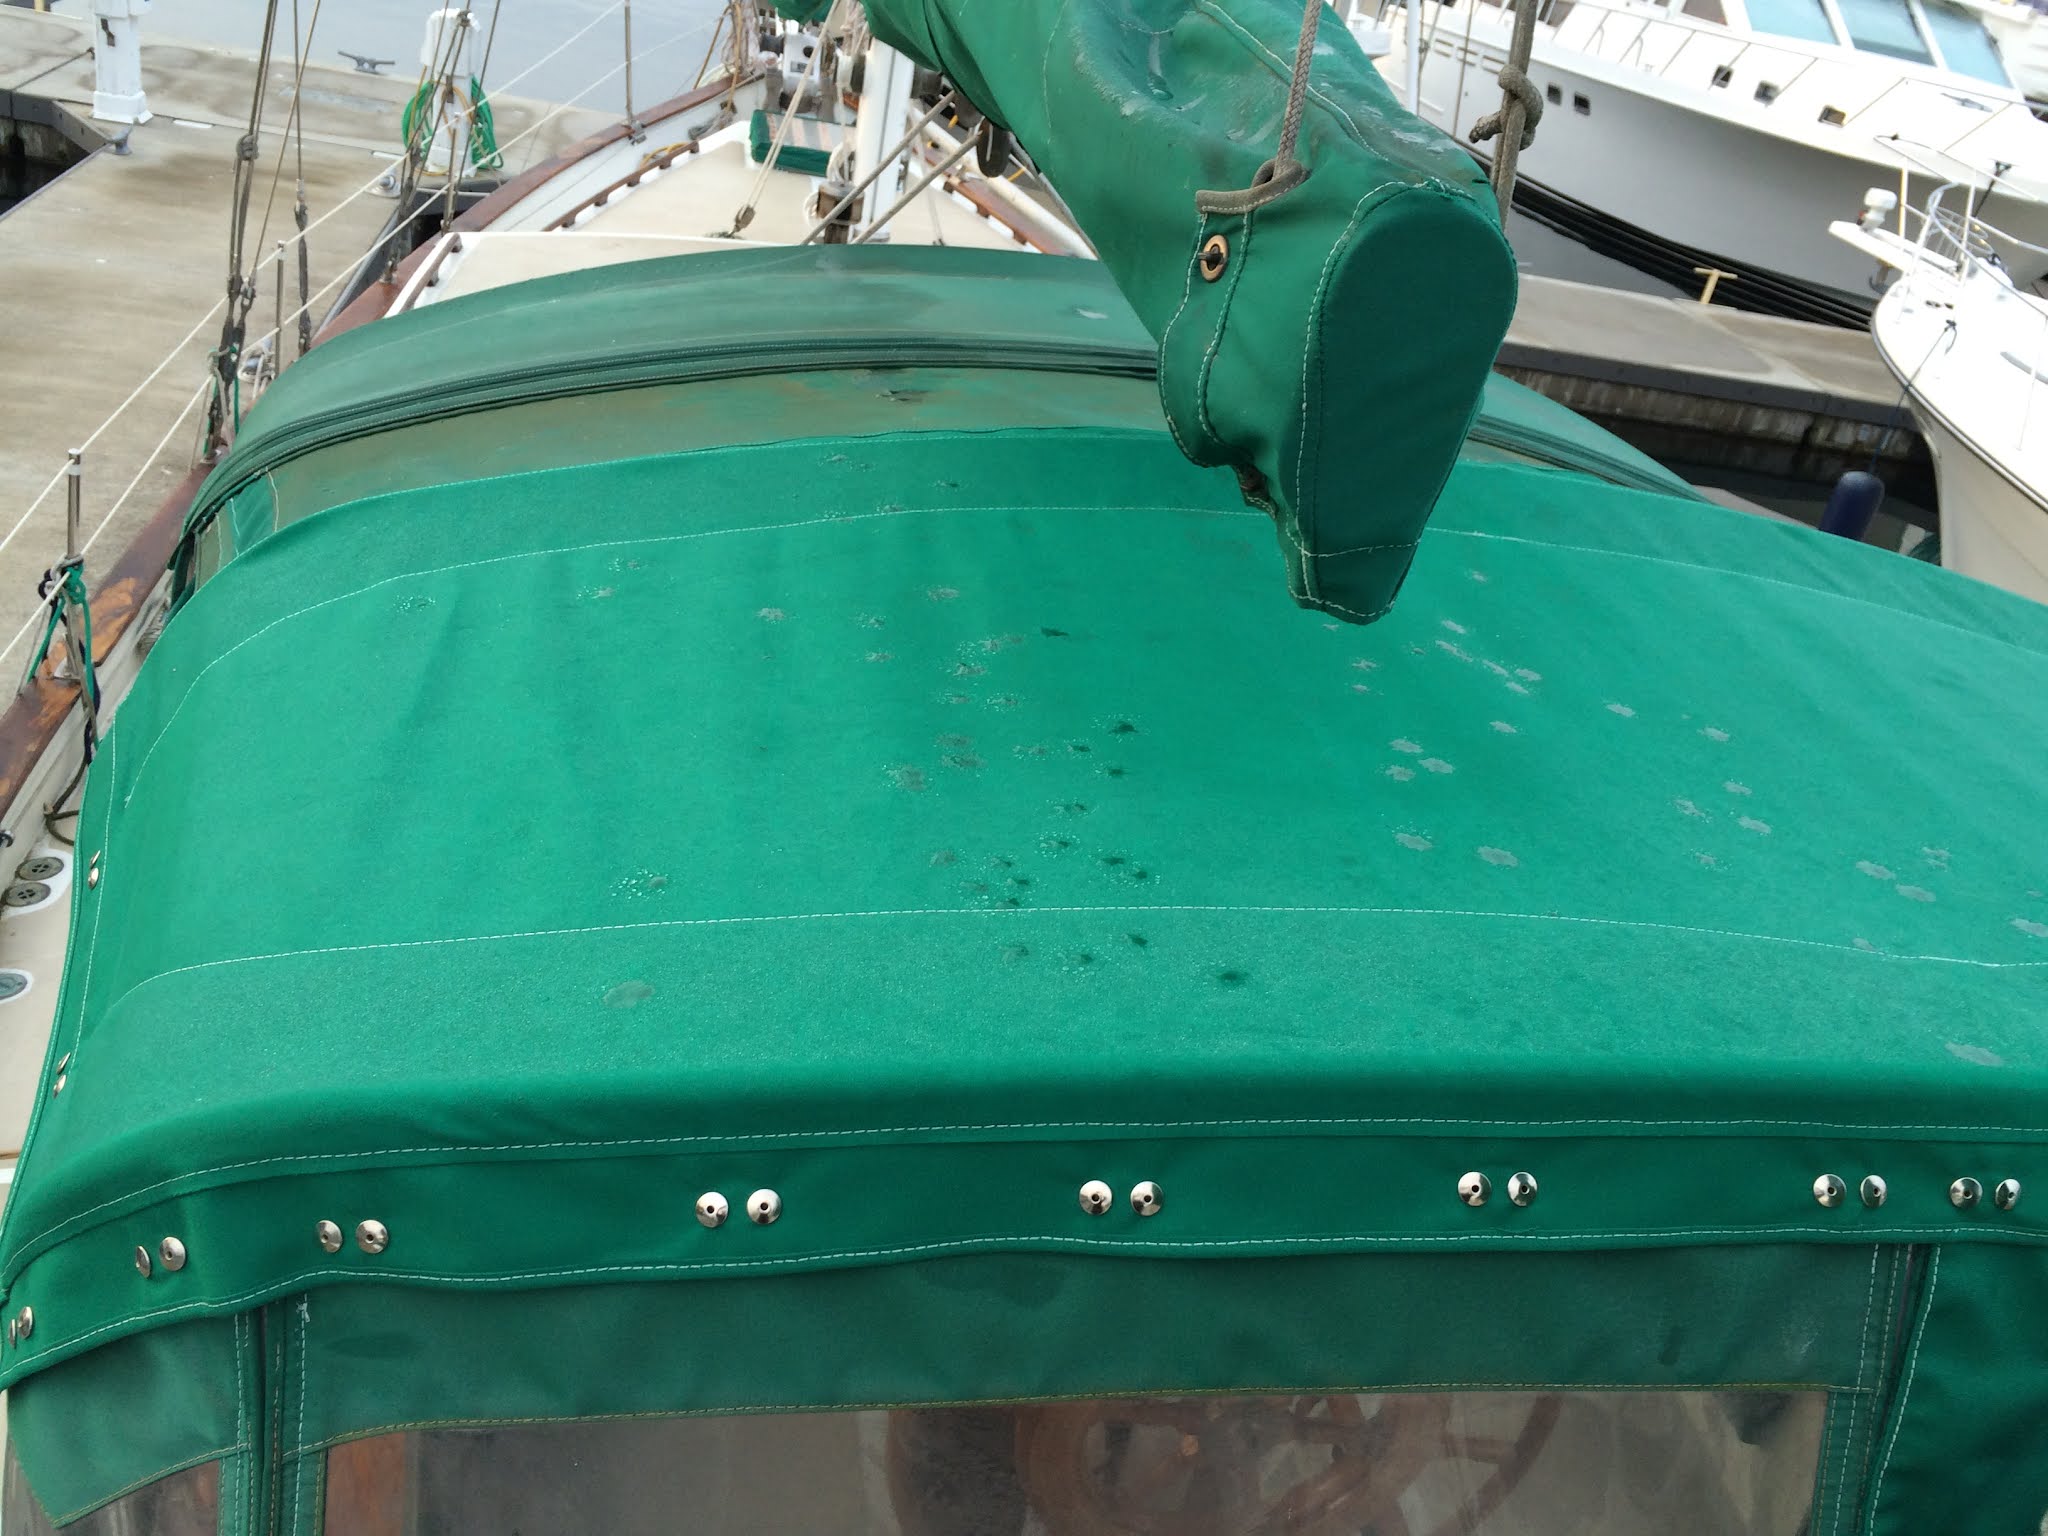
 Way back in 2004 when we had Barrett Enclosures in Seattle make new cockpit canvas for Eolian, they produced the dodger as a single, complex piece of canvas consisting of three major pieces, all sewn together:

  • The "windshield" portion that provides the forward view,
  • the "roof" which covers the space between the first and second bows and provides shelter when the sliding hatch is opened, and
  • the sea hood, which covers the sliding hatch, preventing rain and spray (and boarding waves...) from entering the cabin around the sliding hatch.

When I redid all the horizontal cockpit canvas, I made a new roof piece.  To install it, I cut the original roof piece off and made the new roof attach to the top of the windshield with a row of Common Sense fasteners:


 Well now it was time to replace the sea hood portion.  I had two choices for the connection to the windshield, since I had no intention of sewing it directly to the windshield:

  • Create a flange on the aft edge of the new sea hood that will lay in front of the windshield.  This would do well at shedding boarding seas.
  • Create a flange on the aft edge of the new sea hood that will lay behind (inside) the windshield.  This would do well at shedding rain.

Given that the necessity of shedding rain far, far, far outweighs the need to shed boarding seas (center cockpit boats are great!), I selected Option 2.   And once again, it is attached with a row of Common Sense fasteners. 


This arrangement has gotten an acid test with this year's November storms, one after the other, with 50 kt winds - it is working great!


Share/Bookmark

Saturday, November 20, 2021

The Old Ways

 (Yes, I know it has been a loonngg time since I added to this blog.  Life.)

I looked back to see, and I don't think I have ever mentioned this topic, so here goes.

As a part of owning Eolian and being responsible for her maintenance and upkeep, the beautiful teak and holly cabin sole needs periodic maintenance - more so in the more frequently traveled areas.  This involves taping off an area, sanding with 220 grit sandpaper to provide "tooth" for the new coat of varnish to grip, and then applying varnish.

Recently, I took on the sole beneath the dinette table - an area that gets scuffed by people getting in and out of the dinette seating - something we do several times a day when aboard.

Here is a pictorial of that trip:

Tape and sand

Apply varnish

Voila!  Pull the tape.

But here is where the "Old Ways" part that I put in the title comes in:

When people are sliding out of the aft dinette seating, just above where this picture was taken, the natural tendency is to place your foot on the edge of the raised sole to assist.  A shiny varnish surface provides no traction for this, and in fact can lead to an awkward slide and fall.  To counteract this, I apply some non-skid to the edge of the raised sole just there.

What kind of non-skid, you rhetorically ask?  Why, I'm happy you asked:  I use salt varnish.  This is a method whose origins are lost in the dusty archives of boating lore...  but it is dead simple and very effective.

  • Mask off the area to be treated, apply a fresh coat of varnish.
  • Immediately sprinkle salt liberally onto the wet, uncured varnish
  • When the varnish is cured, vacuum off the salt, pull the tape, and remove the remaining salt by dissolving it in water using a wet sponge.

Tape, varnish, salt

Easy and effective!
 

One should never disparage the Old Ways - there are some very clever and effective solutions hidden in them!


Share/Bookmark

Friday, July 16, 2021

Public Service Announcement: Aerosol Cans and Heat

Some of you may have heard that we had a completely unprecedented heat wave here in the Pacific Northwest.  Seattle temps exceeded 110°F!

There are consequences from this kind of heat.

These are the remains of a Freon airhorn that we had kept in the cockpit, for decades.  It says right there on the can, "protect from temperatures above 120°F".  Well, sitting there in the fully enclosed cockpit, under the dodger windows, in the sun...

Yeah, it exploded.

And in doing so, some pretty significant damage occurred.  In a forensic reconstruction (by me...), when the pressure became too much, the bottom seam on the can came unwrapped.  The bottom disk (not that crumpled piece in the picture at the bottom of the canister - that's the diaphragm for the horn) stayed attached to the top edge just a tiny bit longer than the rest of the canister.  As a consequence, it flew upward, punched a hole in the dodger roof, and left the boat completely.

The canister, now propelled by a liquid/vapor explosion, rocketed forward with enough force to completely trash the 4 foot long teak 1x2 cleat to which the bottom of the dodger window is attached, breaking it into several pieces.  The top of the canister was severely dented in the process, and the plastic airhorn was completely destroyed.

The rocket exhaust from the exploding canister did more damage in the cockpit.

Thank heavens this was not a can of spray paint, or sunscreen, or even worse propane or butane.  At least the non-flammable Freon evaporated leaving no trace.

Those of you who are out in the southern climes probably already take precautions with aerosol cans.  But just in case, I hope that you will take this to heart.  Aside from the damage, someone could have been seriously hurt by this explosion.  And the way Murphy works with sailors, the canister would have exploded just as someone disturbed it by picking it up to put it in a shady place.


Share/Bookmark

Saturday, November 14, 2020

Apples... Many Apples

 
We have two apples trees on our Camano Island property.  If you have apple trees, you'll know that in the fall you get more apples than you can deal with.  You give some away (until the neighbors pull their curtains when they see you coming).  You make apple sauce, apple crisp, apple cobbler, apple pies.  It's a problem like the zucchini one - What do you do with the bounty?

Well here's an idea you may not have considered...  apples as a vegetable side dish with dinner.

Apples as a Veggy
  1. Quarter, core and cut up into approximately 1" pieces enough apples to fill a 4 qt sauce pan half full
  2. Chop up a medium onion
  3. Mince 4 large garlic cloves
  4. In the sauce pan, sautƩ the onion and garlic in 2 Tbsp butter
  5. When the onion has softened, add the apples to the pan, and 2-3 Tbsp white wine to deglaze, and cover.
  6. Cook covered until the apples have softened, then uncover and cook just until the sauce has thickened.
  7. Serve hot
 
For variations on the basic recipe, try these:
  • Add 1/2 tsp (or to taste) curry powder
  • Add 1/2 tsp Garam Marsala and deglaze instead with 2-4 Tbsp Marsala wine or Sherry
  • Add 1/2 tsp cumin and 1/2 tsp (or to taste) chili powder.  Deglaze instead with 2-4 Tbsp red wine


Share/Bookmark

Monday, October 5, 2020

Persistence

Persistence pays off in the end, if you don't give up too early.  This is one of those cases...

Remember this post?  In it I talked about using aluminum tape to seal the top of the mast boot to the mast proper...

When it was new

Backspacing at least 10 years, we have been dealing with intermittent leaks at the mast partners.  Each thing that we have done has improved the situation... but the leaks, tho diminishing in quantity and in frequency, have persisted.  Replacing the mast boot, resealing the deck ring, and finally replacing the deck ring altogether with a composite material that won't absorb moisture and consequently change shape and break the seal have all helped.  But even after all this, there was still the occasional drip coming down the mast in heavy rain and wind. (OK, maybe I am a little anal retentive here...)

Looking up from inside revealed that the water was not coming in at deck level - hooray!  That leak is stopped!  Instead it was coming from higher up.  The only place where it could be originating was at the seal between the top of the mast boot and the mast.  However, a brief inspection (because it was raining) did not disclose any flaw there.

But.  The water simply had to be coming in there.  So I pulled the hose clamp off to get a closer look at things.  Lo and behold, the aluminum tape was just plain gone under the hose clamp!  Galvanic corrosion between the stainless in the hose clamp and the aluminum tape ate the tape, and created an opening for rain to find its way in. 

There are two lessons here.  First, galvanic corrosion is evil.  And just as importantly, frequently corrosion is hidden.  Both very much worth remembering.

The fix was easy:  remove the offending hose clamp (it really was overkill anyway - the aluminum tape is more than sufficient to hold the boot up), and apply a fresh layer of aluminum tape.


Share/Bookmark

Improved Deck Ring

Eolian's deck ring was not molded into the deck because the Downeast 45 was sold with three different rigs: sloop, ketch (Eolian), and schooner.  Because each of these rigs required a different mainmast location, it was impractical to make three different deck molds.  Instead, the deck ring was fabricated from two pieces of teak and bolted to the deck in the appropriate position for each rig.  

But there has been a persistent deck leak originating between the deck ring and the deck proper.  Various attempts to seal the deck ring without removing it had been problematic, working for a while and then the leaks returned.  Eventually, I pulled the ring up and resealed it with butyl rubber. And then there was the little problem at the joint between the two pieces of wood where apparently a piece broke off of the cross-grain at the end, leaving a gap which was filled with a glob of caulk.  In the reseal, I at least used a small piece of teak for the bulk of the required filler. 


But even this was not a complete success.  I speculate that the wood would grow and shrink with moisture, working the seal.  The answer was obvious:  replace the wood with something which was impervious to moisture.  I used Trex composite decking, obtained as a scrap from a neighbor's deck replacement project.  I carefully traced the outline of the wood pieces onto a piece of paper, including the holes for the mounting bolts, took this paper home and relayed the outlines of the two pieces onto the Trex and bandsawed them out.

 
I made the outside edges a little rounder than the teak versions because the hose clamp that holds the mast boot to the ring did not apply sufficient pressure to  the straight sides of the original ring, allowing wind to blow rain up under the boot - thus the foam tape applied to the outer surface. 
 
 
(The mast wedges bear on the deck edge, not the deck ring)


In the final installation (also bedded in butyl rubber), I also applied foam tape to the edge, just in case my "rounding out" the straight edges was not quite sufficient to make a tight seal.

This should last forever.


Share/Bookmark

Thursday, September 3, 2020

Compression

I count 61 boats...

With the Canadian border closed due to the virus, all the boaters that would normally have made a trip up into the Gulf Islands are prevented from doing so.  Consequently the San Juan Islands are absolutely packed this summer.  In the photo above, taken while we were at anchor in Blind Bay, I counted 61 boats.  In a normal year, on a holiday weekend, we would expect 20 to perhaps 30 boats here.

This takes all the fun out of being at anchor - with every boat that you see coming into the bay you ask yourself, "OK, so where is he going to anchor...  right in front of us I presume."  And you will be right.  Then there is the tremendous amount of high-speed dinghy traffic buzzing around.  And the loud music.

We have elected to avoid this, staying at the dock for the latter part of the summer.

(Yes, we are in that picture...  Can you find Eolian?)


Share/Bookmark
Related Posts Plugin for WordPress, Blogger...