Thursday, December 24, 2015

Hung By The Chimney With Care


No stockings, but Santa's hat is hung by the chimney with care, hoping to dry out in time for the overnight deliveries.


And by the way, notice that the glass in the Dickenson is nice and clear - for a nominal price I replaced the old one.  It had become a little cloudy and frosted over the decades, I assume by the reaction between ash, glass and high temperatures.


Merry Christmas to all!  May visions of AIS transponders, chart plotters and new sails dance in your heads!


Share/Bookmark

Monday, December 21, 2015

Peace On Earth


Peace on Earth.

And on the docks.  Please.

Novembers and Decembers are normally stormy months here in the PNW, but this year has taken it to extremes.  We have been blasted by one major storm after another since the beginning of November.  We are all getting weary of the wind and rain - I am pretty confident that I am speaking for everyone on the docks with this.

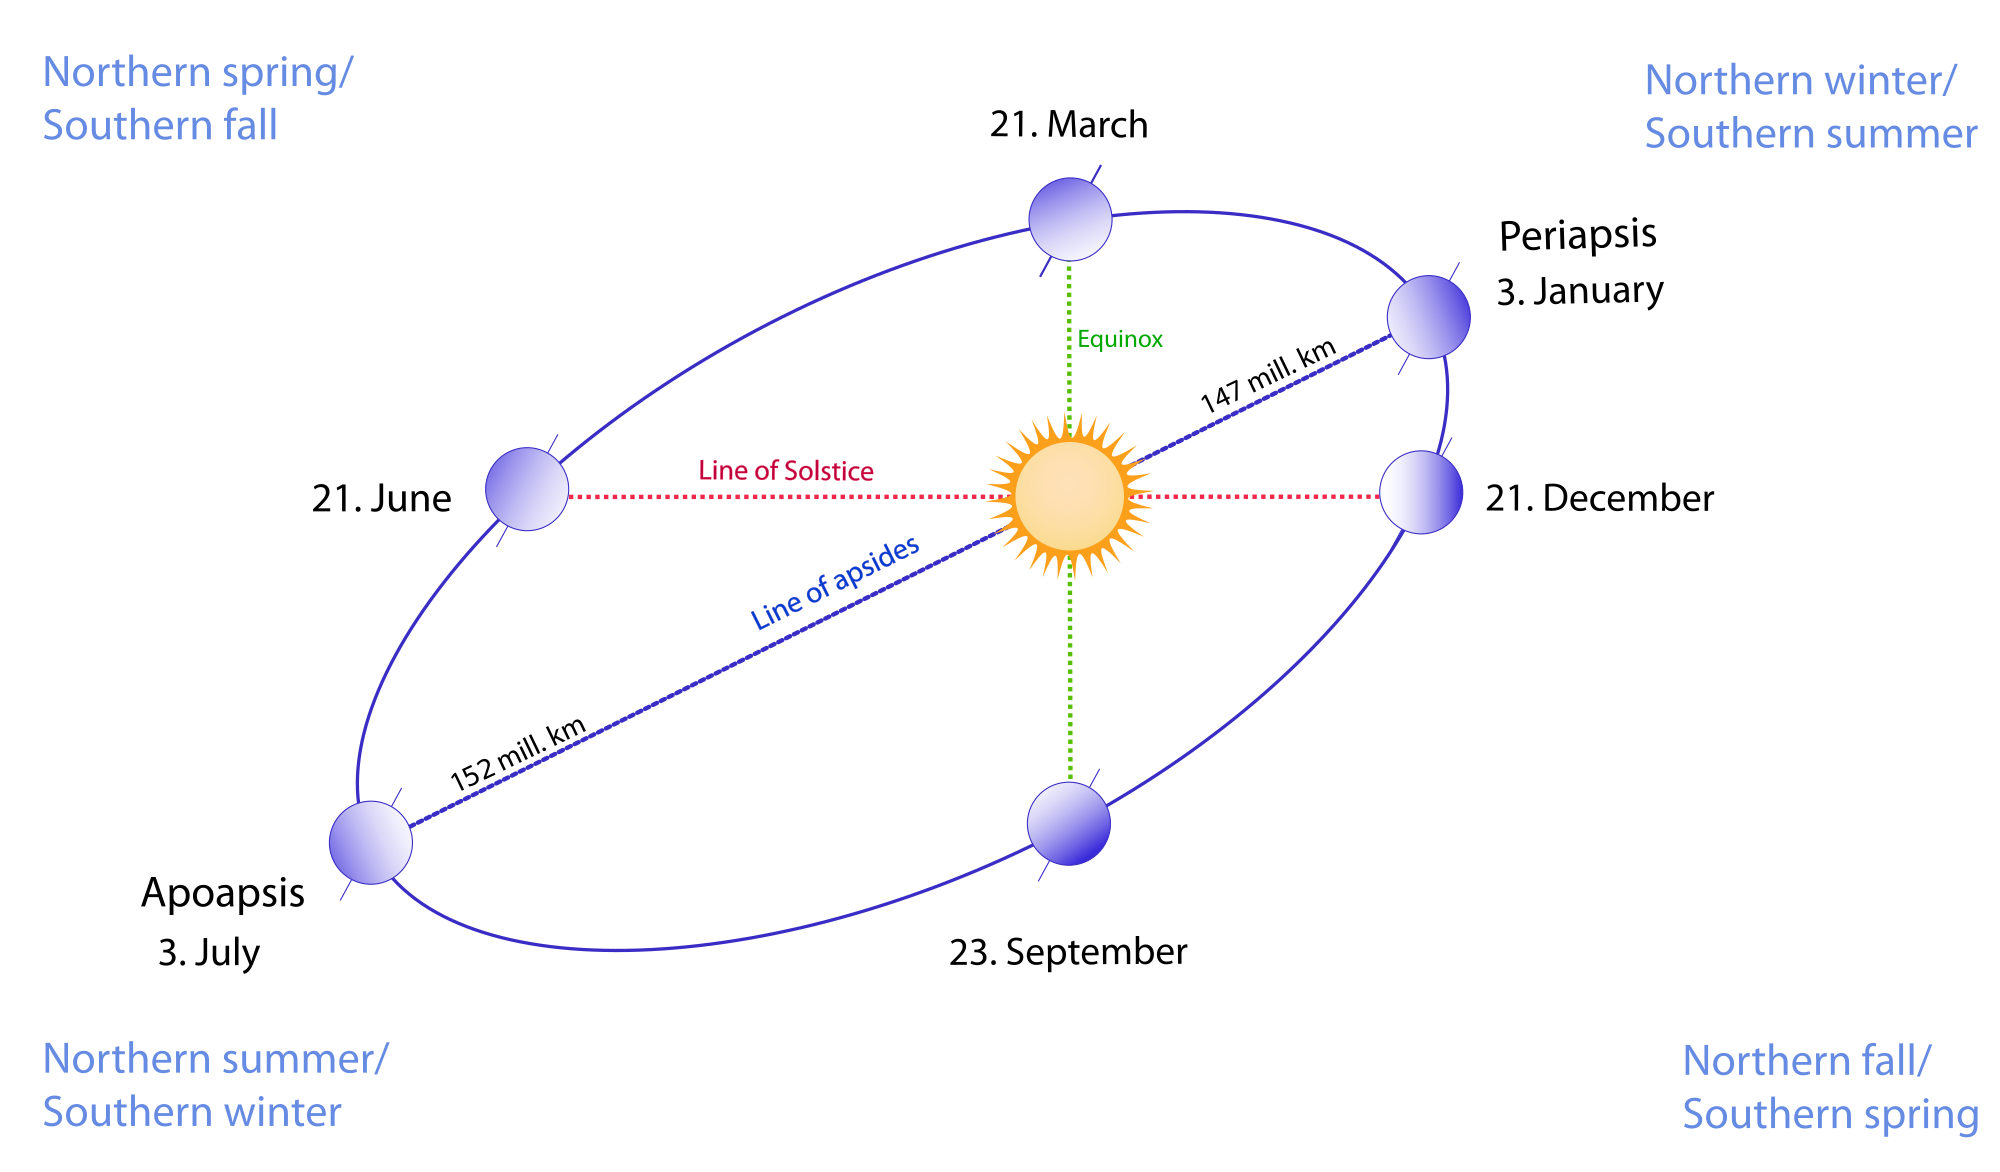
Ah, but today is the day I have been looking forward to since that first November freeze:  the winter solstice (technically, at 8:49 PM)!  From this day forward, until all reckoning is lost in those warm golden hazy days of June, each day will be a little longer.

And the sun will ride a little higher in the sky every day.  In fact, this time of year, the sun is so low that much of the day is lit by that reddish orange cast that normally only comes with sunrise and sunset.  This preys on the soul.

So today we are looking forward to the beginning of the new set of seasons, to the end of the terrible storms, to the lengthening of the day.  To peaceful sails under warm 15 kt breezes and sundowners in calm anchorages.

Today starts the journey to Summer!


Share/Bookmark

Monday, December 14, 2015

It's About Time

I can't believe that so much time has slipped by.

Needing to do some straightening and cleaning out, I delved into the dark recesses of our storage shed and found...  No, you probably didn't guess it.  Eolian's old bowsprit.  The one I removed in 2008, seven years ago.  SEVEN YEARS!

So, how do you dispose of a 10 foot long piece of partly rotten mahogany?

A symbolic act

Exactly.  You chainsaw it up into two foot long pieces, stack it up and burn it.  Stuffed in the bottom of the pile there you can also see the remains of the mizzen spreaders, which I also rebuilt, but just this last spring.  I really don't have a good explanation for why I kept the old bowsprit around so long.  But each time I looked at it over the years, I told myself, "I'll hang onto it a little longer, just in case."  Just in case what?  I have no idea - but somehow I felt that I was making a prudent decision to keep it a little longer.  No, I don't understand how my mind works either, but I have learned to live with it.

As it turns out, replacing the bowsprit couldn't have waited...  shouldn't have waited as long as it did.  When the saw dug into the last cut, two feet from the butt, a flurry of powder exploded out instead of chips.  There was not very much wood in there...

Not good

In fact, the rot had hollowed out the inside of the spar.  Frightening!  Despite this, there was very little evidence of the rot on the outside.  A sobering exposé for those whose boats have wooden spars (hopefully not made of mahogany, a terrible wood choice for outdoor service).

At this point, the only remaining unreplaced wooden spars on Eolian are the main spreaders, which I continue to inspect carefully every year, and to which I apply a fresh coat of paint as often as needed.  So far, there is no reason to replace them - they are as sound as when they were new.


Share/Bookmark

Monday, December 7, 2015

No, It's Not That Simple

The tide comes in, the tide goes out. The current flows in, the current flows out. That's it, right?

Well, no, actually.


First a little orientation for those of you not familiar with the area - this image shows the upper left-hand part of Washington State.  The important features to note are:
  • The Strait of Juan de Fuca - the large strait connecting the Pacific Ocean to the entire Salish Sea
  • Puget Sound - the body of water reaching from a little north of Everett southward - basically everything south of the large word "Sea"
  • The San Juan Islands - the group of islands just north of the large word "Sea" and south of the border with Canada
  • The Strait of Georgia - the body of water running north of the San Juan Islands, between Vancouver Island and the Canadian mainland

So the water coming in via the Strait of Juan de Fuca (and it is a LOT of water - imagine how much has to flow thru here to raise the water level in all of Puget Sound and the Strait of Georgia 12-16 feet in just 6 hours...) meets a decision point when it reaches the eastern end of the strait...  it is forced to split, part going north into Canada, and part going south into Puget Sound.  That's a lot of momentum, forced to make a sharp turn in one direction or the other.  You might imagine that things could be a little, umm, confused at the eastern end of the Strait.  And you'd be right.

But like Ron Popeil says...  "Wait!  There's more!"  

Tho the water heading south to Puget Sound has a pretty straight shot past Point Wilson and into Admiralty Inlet, the northbound flow faces the obstruction of the San Juan Islands:


The image above shows a realistic picture of what the flows look like (the entrance to Admiralty Inlet and Puget Sound is at the bottom right-hand corner).  First, notice that two major gyres have developed, just south of Victoria and at the entrance to Admiralty Inlet, and some minor ones off of Port Angeles and at Cattle Pass just south of San Juan Island.  And the flow paths thru the San Juan Islands themselves are by no means simple.

But wait!  There's more!  

The picture gives the impression that things are static.  Reality isn't.  The flows morph and change throughout the entire tidal cycle, changing and reversing directions in the most amazing ways.  And the flows are different for each day in the tidal cycle, and for each month of the year.  In our area we have two tidal cycles that, like two wave trains on the ocean, some times nearly cancel each other out, and at others reinforce each other.  How could a mariner ever keep track of all of that?

Well there is an answer.  In 1999 the Canadian government compiled a series of nearly a hundred charts like the one above and published them in book form (the chart above is a portion of one of them):


But wait! There's more!

It's not easy to select the chart that applies to a particular date and hour.  I'm not going to go into how the published instructions in the book select the particular page you need.  Just know that it uses a couple of nomographs and is not simple.

Because of this, there are a couple of published tables (Washburne's, Murray's) that you just enter with a date and time and they tell you which page in the Current Atlas applies.  But tho the Current Atlas is timeless, these published tables need to be re-purchased each and every year.

But wait! There's more!


There is a solution to that too!  A sharp individual named Emanuel Borsboom puts equivalent tables online for you to view or download and print (free for non-commercial use).  If you are computer savvy, he also makes the code that produces the tables available.  With that code, you can produce your own tables forever, without depending on Internet access.  Or Borsboom's continued interest in publishing them online.

So, armed with this information the astute mariner should not get caught unintentionally stemming an adverse current. With flows approaching 5 kt in some places this is not unimportant, especially for sailors whose boat speeds mean that they could actually be moving backwards.

Our copy of the Current Atlas is on its way, and we are looking forward to speedier and more relaxed passages next season!  No surprises!


Update

The world has moved on in this Internet age - you must see this!


Share/Bookmark

Tuesday, December 1, 2015

Salvage? Or...

All of us here in Puget Sound are aware that we've had some pretty tremendous wind storms lately, especially those of us who went days without power.  But the boaters among us are even more aware.  Whether your boat was tied to a dock, moored on a buoy, or (Heaven forbid) at anchor during these storms, there was a great risk of damage.  In the worst case, the boat would be torn loose from its moorings...

And that happened to this Riviera Star 24 (made by Progressive Plastics in Richmond BC) that washed up onto the launch ramp at Camano Island State Park.  

November 26

Apparently, adrift and driven by the high wind, the boat first ran into the finger dock and then jammed under it, keel first, where it spent some time, pounding on, and being pounded by the dock floats, as high wave after high wave passed thru.  It must have at some time been nearly completely horizontal, since there is sea grass high in the rigging as well as all over the deck.

I spoke to the Park Ranger and asked what the story was about this poor runaway...  He told me that they had been concerned about damage to their dock so they pulled the boat off and tied it as you see.  The Park rules do not allow overnight moorage on the dock, so just tying it to the dock was not an option.
 
November 27

Talking to the Ranger, I allowed as how the Park had acquired a boat thru salvage rights.  But no, he told me that their lawyer had advised him that the boat was still the property of the original owner, and that they had begun a legal notification process that would last at least 30 days.  Supposedly at the end of the notification period, they could legally declare the boat as derelict and then take possession of it.

November 30
As you can see from the progression of pictures, the boat is now full of water.  The interior is surely a ruin with all wood bulkheads and other items warped, the wiring is soaked in seawater and will need to be replaced.  In fact at this point the boat would be more valuable as a bare hull.  By the end of the notification process, after another month (at least) of pounding on the bottom, even the value of the hull will probably be lost.

December 7

So... Has the park received good legal guidance, treating this boat exactly as if it were an abandoned automobile under land-based law?  Doesn't a boat adrift constitute salvage under Admiralty law?  I do know that when a friend of ours lost his engine, grounded on the rocks and called for a tow, his boat was declared salvage and became the property of the towing company (he eventually bought it back via the normal procedures).

How is this situation different?


Share/Bookmark

Saturday, November 21, 2015

Past Denial


It's 10 AM and there is still frost on the dock... there's no getting past it.  Winter's coming.  I find in the morning that the heat pump runs nearly continuously, extracting heat from the water Eolian floats in to replace that which is leaking away from her exposed exterior surfaces, radiating off into space on these cold, clear nites.

Snow can't be far behind, and in fact would be welcome because the clouds would block the pitiless cold of space.


Share/Bookmark

Monday, November 16, 2015

Perspective

We recently returned from a trip to the UK.  Like all times away from home for me, that trip took me out of myself a little, and gave me new perspective.  One of the benefits of travel, I guess.

Parallel history...  what was happening somewhere in the US when...


First of all, 1779 is a common late year that you'd encounter in the UK. Here, this is Iron Bridge - the first bridge to be made of cast iron in the world. Industry sufficiently advanced to create the huge castings this thing required shows just how far things had progressed in the UK.  While the bridge was being built, the Revolutionary War was raging on the US east coast.  And it had been only 3 years since the first western building of any kind had been raised at San Francisco.  It would be 13 years in the future when George Vancouver would bring HMS Discovery into Puget Sound for the first time, making it known to the western world.

But as I said, the 18th century is late times in the UK.  Let's step back a little further, 240 years further back.

Ruins of St. Mary's Abbey, York
In 1539, St. Mary's Abbey in York was destroyed by King Henry VIII (it had been built some 300 years earlier...).  This was only 47 years after Christopher Columbus had chartered three boats from Queen Isabella (obligatory sailing reference, check!) and come ashore for the first time in the West Indies, revealing the existence of the New World.  On the US east coast, west coast, and Puget Sound, First Nations peoples had yet to see westerners.  Longhouses were the architectural pinnacle in North America.


OK, let's step back another couple centuries, to 1312, when one William Binnoch snuck some warriors into Linlithgow castle in a hay wagon to take it for Robert the Bruce (see the movie Braveheart for a visual portrayal of the era, tho not this incident).  Why do I bring this up?  Because Binnoch was a forbear of mine on my mother's side.  For his efforts, Robert the Bruce awarded Binnoch 1000 acres near Linlithgow, at Ecclesmachan.

Ecclesmachan - part of the Binnoch grant
What else was happening in the world then?  The New World was not even Terra Incognita - its existence was not even suspected.  Marco Polo was eleven years from his death and Kublai Khan reigned in the far east.  Saint Thomas Aquinas died some 39 years earlier.


OK, now a bigger step - back to AD 50 when the Romans did their first construction at Bath, site of a natural hot spring in southwestern England.  The Roman Baths are a World Heritage site and are very well managed.

Are those two Roman ladies?
We are now two millenia into the past; the Romans rule the Known World, Christ recently died, and a Roman slave named Spartacus escaped with seventy-seven other prisoners and seized control of nearby Mount Vesuvius.


And finally, this:


The first construction at Stonehenge proper was in about 3000 BC, when a circular ditch about 100 yards in diameter was constructed.  About 500 years later the first of the big stones were raised.  But Stonehenge is not the first prehistoric structure on the Salisbury plain.  Other structures have been dated as early as 3800 BC, and new discoveries in Durington Walls (a couple of miles from Stonehenge) could push this back to 4500 BC - we are approaching the end of the last Ice Age here.

In this period, the city states of Sumer and the kingdom of Egypt were established and grew to prominence. Agriculture spread widely across Eurasia. World population in the course of the millennium doubled, from approximately 7 to 14 million people.  Ötzi the Iceman died near the present-day border between Austria and Italy, and silver was discovered.


This trip made me dizzy - I feel as tho I am standing on the edge of a very high cliff, looking down into the past.  And in Great Britain, that view goes a long, long way down.
Share/Bookmark

Monday, November 9, 2015

A Tale Of Two Tails.

A quick revisitation of this issue, with an illustration.  And then I promise I will shut up about it.

Consider the forward edge of the aft bimini roof panel.  Because I am lazy, I originally made the tail as a hang down tail.  That is, the tail was a long skinny rectangle - easy to cut, and minimal fabric usage.  But because it had no curvature, it did not match the contour of the front edge of the panel.  Consequently, after installation it had a scalloped appearance and made a loose fit to the center panel:

Hang down tail.  Bow is to the left, and new panel is on the right
What is worse, with Eolian moored facing into the weather, when it rained (and oh, does it rain here in the PNW), the wind blew the rain under the edge of the tail and into the cockpit.  In fact the tail acted as a funnel, actually scooping in rain.


Tuck back tail - doesn't that look better?
So I picked all the seams and took apart the front edge of the panel.  And I cut fabric for a new tail, this time a tuck back tail - contoured to match the forward edge of the panel.  The result is gratifying - look how tightly it meets up with the center panel!  The built-in curvature makes the edge of the tail actually press down on the center panel - wind-blown rain is excluded (tested less than an hour after reinstallation... this is the PNW after all).

So far, I cannot think of a situation where I would use a hang down tail.

Previous post in this series

Share/Bookmark

Monday, November 2, 2015

Living In Two Places - How To Do It

The Green Bag
From 1997 until 2013 we kept Eolian at the Shilshole Bay marina in Seattle.  During this time she served as our Seattle home because I worked in Seattle.  That meant that the majority of our time was spent onboard, with brief weekend sprints to our log cabin on Camano Island.  Now that I am retired, our time is more evenly split between Eolian (now in Anacortes) and Camano Island.

So, for the last 18 years we have been living in two places.  How does that work?  How do we do it?

First, it takes a lot of organization.  Those of you who know me know that organization is not one of my strong suits, but thankfully, it is Jane's raison d'être.  So what follows here is the system that we have developed to make this work.  Tho in our case it applies to a house and a boat, I imagine it would apply equally as well to the case of two houses (for example, a primary home and a vacation home).

The System

The more self-sufficient you can make each location, the less you will have to shlepp back and forth.  There are limits of course.

In no particular order:
  • Pay your bills in one place; keep all your records in one place.  If you have things in both places, you'll never be sure whether or not you've paid that credit card bill.
  • Have a marshalling location in both places.  That is, a place where things can be collected which need to go to the other location - put things here when you think of them.  This way it is not a giant fire drill when getting ready to leave - things can be accumulated over time.  And then when it is time to pack up, you can be almost certain that nothing has been forgotten.
  • Have a solid, sturdy laundry bag.  It will get dragged back and forth full of dirty clothes going one way and clean clothes going the other.
  • You will need a set of commonly used tools in both locations.  A boat should be well-equipped with tools in any case, in order to be able to handle breakdowns at sea. For seldom-used specialty tools, see The Green Bag.
  • The Green Bag.  The Green Bag always goes with us.  It is a marshalling location for small items.
  • By and large, it works best if grocery shopping is done independently at each location.  Keep a separate grocery list for each location.  This will help prevent, for example, having 3 bottles of ground cumin at each end.  Search for a smartphone app called "Our Groceries" - it allows multiple people to manage a shared grocery list (or multiple lists...).
  • There will always be some food items that need to be transferred, say a partial gallon of milk or some particularly delectable left-overs.  Bag these together and put them in the marshalling location just prior to departure. 
  • You will need a set of commonly used spices in both locations.  For seldom-used specialty spices, see The Green Bag.
  • Have no loose items.  Everything should be bagged if possible.  We make extensive use of those reusable grocery bags that are now so in vogue.
  • Have a formal shutdown process for each end.  Follow it religiously.  In the beginning, it may be necessary to write it down.  After 18 years, not so much.
  • Leave yourself sticky notes to cover unusual circumstances when you think of them - don't try to remember everything at the end when you're packing.  Put them in the marshalling location.
  • Make your cell phone your primary telephone number.
  • Have a single official location for important items that need to travel, such as a checkbook (in our case, this always lives in my briefcase).  Always, always return the item to its official location after use.  If you violate this rule, you will be certain to find yourself at the boat without your prescription sunglasses, for example.
  • Computers are cheap enough now that you can have one at both ends.  But if you are not careful, you computer file systems will be like those two spice drawers...  There will certainly be a collection of directories that you would like to have be in sync on both machines.  Use a cloud service for these, or use a thumb drive to copy these directories back and forth (I use linux - rsync is my friend).
  • Reading material - I have only one word for you here: Kindle.
  • Cell phone chargers and cables are small and cheap - have an adequate number at both ends.
  • Outer gear - keep location specific clothing at each end.  Keep the foulies on the boat and the Carhart chore coat at the house.  If you wear a raincoat to the boat, be sure to put it in the boat marshalling location so that it will go home with you when you leave.
  • Hand projects like knitting should be handled as travelling projects - always prepared to go back and forth.  That is, each should have its own bag and live in it.
So that's how we do it.  Those of you out there who are doing the same thing  have additional suggestions I'm sure...
Share/Bookmark

Monday, October 26, 2015

Bimini Renewal: One Third Done

OK, as promised, here is the result.  I am one third done with redoing the bimini and dodger. That is, I have completed the bimini roof (I am excluding the side curtains and the dodger front from consideration at this point in time - the vinyl is still serviceable, and because these surfaces are not horizontal they have not suffered sun damage to the same extent).


I think it came out pretty good. In fact, it looks about as good as the original did when it was new and before shrinkage pulled everything tighter than a drumhead.

So, can you do this yourself?  The answer is yes.  But first, I strongly recommend that you view the following Sailrite video: How to pattern a bimini. There used to be another video on the website that took you thru the process after patterning, but they have apparently taken it down. But if this whets your appetite, then get this DVD and study it, thinking thru each thing that is done, and understanding why it was done.

First, nomenclature.  In the roof panel I made, there are three major piece types:
  • The roof panel itself - the largest piece of fabric by far
  • The sleeves.  These pieces of fabric form the sleeves which zipper around the tubing at the front and rear of the roof panel.  
  • The tails.  These are the narrow strips of fabric that hang down at the front and rear of the roof panel - they serve as the attachment points for the side curtains (at the rear - on mine you can see the rivets holding the Common Sense fasteners) and the center panel (at the front).
  • There are also some narrow reinforcing strips that go on the bottom edges of the sides to strengthen the attachment points for the side curtains.
If you decide to tackle this project I have the following recommendations for you:
  • Use Tenara Teflon thread.  I can't recommend this strongly enough.  The special "UV resistant" polyester thread will last approximately 5 years (in the PNW - less in the tropics).  The Tenara thread will last indefinitely - far outliving the fabric.
  • When sewing, use the basting tape that Sailrite sells.  The stuff you can buy in your local fabric store is designed to wash out and is a far weaker adhesive.  Use 3/8" for most seams and 1/4" for zippers.
  • When installing zippers, make sure that they will be covered - that is, protected from the sun.
  • Tools - you should buy these tools and consider them part of the cost of the bimini.  Your cost will still be far, far less than what you'd pay for professionally built canvas.
    • First and foremost, a walking foot sewing machine.  You just can't do this work with a home sewing machine. I have a Sailrite LSZ-1 and love it.
    • A binder of some type for applying bias edging tape
    • This nifty tool set for installing male Common Sense fasteners
    • This punch for installing Common Sense eyelets
    • Please note that my project did not require installation of snaps, Lift The Dot fasteners, etc. so I have not included tools for their installation here.  But if you need these fasteners you should look carefully at the tools that Sailrite offers.
  • If you are doing what I did, replacing an existing bimini, you can pattern right over it without removing it.  This allows you to get a better take on where the edges need to be, and saves a lot of labor.  You should apply the seam stick tape directly to the old bimini without an intervening layer of some other kind of tape.  It holds better, and yet can still be removed after the patterning.
  • For the panel to install correctly and fit well, it is critical that you consider and think about things like this:
    When patterning, the line defining the front and rear seams (where the sleeves and tails attach to the roof panel) should be made, not on the top of the tubing, but rather 90° away on the front (or rear) side of the tube.  Doing it this way makes it simple to attach the other edge of the sleeve.  Magically, you can just smooth the sleeve flat against the roof panel and stitch the zipper where it lays, without making any allowance for the wrap around the tubing whatsoever. I know that doesn't seem right, but it is.  Get out some strips of paper and try it out - I know that I had to in order to convince myself.

    If on the other hand you need for the seam to be on top of the tubing (as for example if the seam joins two adjacent roof panels over an intermediate support), then you cannot simply lay the sleeve flat to determine its attachment point to the roof panel.  Instead, lay it flat, mark the edge, and then move it back 1.25 inches (I think...  get out your paper strips and confirm this number - it will depend on the size of your tubing) and attach it there.  Because in this case you do need to account for the wrap around the tubing, and it's a surprisingly large amount.

    If you should use a top seam for the forward edge of your roof panel, you will need to make the tail wider by half the diameter of your tubing so that it will extend the desired distance.
  • You will face a decision whether to use "hang down" tails or "tuck back" tails.  Hang down tails are just straight rectangular pieces of fabric; tuck back tails are contoured to match the edge of the bimini to which they will be attached.  I initially made mine with the hang down tails, but I was disappointed with the way they, well, hung.  Because they are straight fabric pieces, they do not follow the contour of the bimini - they just look bad.  I made new tuck back tails, ripped out the seams and installed them.  
  • When laying out the sleeves or the tuck back tails, the video may encourage you to use the pattern to determine one edge and then laboriously lay out a second line the desired distance away by making a series of markings perpendicular to the original line.  This is unnecessarily tedious.  Instead, lay out the first line using the edge of the pattern, pull the pattern back the desired amount, and lay out the second line, again using the edge of the pattern. 

As you can see, there are two more panels that need to be reconstructed. And that sail cover is looking pretty shabby too...


Previous post in this series

Share/Bookmark

Monday, October 19, 2015

For Better or For Worse

The great wheel of the seasons turns; the Earth continues inexorably in her orbit around the sun.  To those of us here in the north temperate zones, that means that the boat is put into "winter mode".  For some that means a haulout so that the water can freeze up without the restraint of an interfering hull.  For us in the Pacific Northwest, it means a backup set of docklines and an additional four fenders so that the boat can weather the winter storms safely in her slip.  (And to those of you in the South Pacific and Caribbean... pbbbt!).

This is the time of The List.   It is when we look our vessels over with a (hopefully) jaundiced eye, enumerating all the things that need to be done to have her ready for next spring, and to be in yet better shape than last year.  You see, all of us have taken a Vow with our boats, to protect and support each other in the best of times and in the worst of times.  And this is the time of year when our part of the bargain comes due.

So: The List.  What goes on it?  Well, all the normal seasonal maintenance projects of course.  But do you have a guilty feeling deriving from knowledge that the mizzen spreaders should be replaced?  That there is rot in the bowsprit?  That the primary bilge pump down in the deepest part of the bilge needs a spelunking expedition to repair?  Well these items go on The List.

And sometimes there is something that you want to do as a present to your boat in exchange for the good times she has given you - not something required, but rather as a gift.  Perhaps this could be a radar upgrade (not required, but nice!), or just something for her vanity.

Some of these List items are inside work, and some depend on decent weather to be done.  But they all go on The List.  And it is working down The List which keeps us in mental and emotional contact with our boats over the winter hiatus, and which fuels the dreams of the coming new season with romps under full sail with blue skies and shining water.


Share/Bookmark

Tuesday, October 13, 2015

Bimini Renewal - In Progress

One of the things about owning a boat for a long period of time (or ageing in general, for that matter...) is that you get to see the effects of time.  They are almost never kind.  But to avoid becoming morose, let's keep this focused on Eolian's cockpit canvas.

Way back in 2003 we had our cockpit canvas renewed by Barrett Enclosures in Seattle.  They did a masterful job.  But that was 12 years ago.  In the intervening years, I have had to redo almost all the stitching (because I made a short-sighted decision to use the somewhat less expensive "UV Stabilized" polyester thread instead of the Teflon thread), refresh the Sunbrella's waterproofing on an annual basis, and deal with slow but inevitable fabric shrinkage.  It is a sad thing to me to see the sorry state that things have reached, from such initial beauty.  So, it is  time to do that "once in a lifetime task", a second time.  New cockpit canvas is needed.

But this time, instead of investing more than ℬ6.500, I decided to give it a try myself.  Already having a Sailrite LSZ-1 makes this a possibility.  So I reviewed Sailrite's excellent online videos, ordered a bunch of Sunbrella, fittings, and notions from Sailrite, and set to work.

After uneventfully patterning the aft bimini panel, I encountered the first problem:  There was no place on the boat large enough to lay out the pattern on the cloth.  We were able to get about 3/4 of it on the cabin top, so we did that and then folded the marked section up enough to get room to finish.  Yes, I know that this process was fraught with opportunities for errors to creep in.  But within the tolerance that we were working with (about 1/8") I think we did OK.

But there are a lot of fabric pieces involved in the aft panel.  Altogether 7 more pieces were needed, besides the obvious big one.  And then the space thing reared its head again.  Working with the LSZ-1 on the edge of the saloon table, I was able to sew the long seams by letting the completed section pass over the table and then off the far edge, on its way back to the floor.

On a project like this, fabric management is always difficult, especially when working in a limited space (tho not as big a problem as this).  My recommendation:  always, ALWAYS use  seam-stick tape, 3/8" for normal seams and 1/4" for zippers.  It is a lifesaver.  And don't be in a hurry.

This last weekend, I finally got the last of it done and installed it.  But sadly, somehow I managed to get the locations for the Common Sense fasteners for one of the aft side curtains off slightly.  Rather than make another set of holes in the new piece, I am going to relocate the eyelets in that side curtain instead.  The thinking is that the side curtain is old and will be replaced anyway at a time in the future much nearer than the just-completed panel.  And because of this, I am not going to show you a picture of it.  Yet.

The plan is to move ahead with the other roof panels in sequence - the loose center panel that connects the dodger to the bimini, and then the top panel of the dodger.  When redoing the top panel of the dodger, I will be revising Barrett's design, making the top panel and the front panel separate pieces - the thing is just too unwieldy for me to handle as a unit.  And in fact, it looks like Barrett made the roof and front of the dodger separately, and then stitched them together as a final step.  I will use Common Sense fasteners to hold them together instead of stitching.

So.  I can say at this point, nearly 1/3 done with the top of the bimini and dodger, that with Sailrite's instructional videos, their tools and their materials, this is a doable project.  It is complex and requires constant attention to detail, but it is doable by the cruising sailor, at a savings of 90% over the cost of having a professional do the work.  But don't figure on getting it done over a weekend...


Share/Bookmark

Tuesday, October 6, 2015

Narrowboats!

Astute regular readers of this blog may have noticed that nothing was posted here for the last three weeks.  To all 6 of you, I apologize.  The reason for the hiatus was that we travelled to the United Kingdom on a holiday trip.  And the title gives it away...  for one of those weeks we tooled up and down the Shropshire Union canal in our very own (rented) narrowboat:  nb Phantasy.

nb Phantasy
Ah, but I am getting ahead of myself.  Before we went out on our own, our friends Kath & Rob took us on an overnite tutorial cruise on Kath's boat, nb BobcatBobcat, at 58 feet long, is 20 feet longer than Phantasy... but still only 7 feet wide (on the outside; 6 feet wide on the inside).

nb Bobcat; inside & out
Aside from the cruise itself, Kath took us thru the etiquette of canal life and gave us a hands-on tutorial on the operation of locks.  And then after we shared a Thai dinner in Stone, they gave us their bed in the master cabin - what wonderful hosts! 

The Boat

Nb Phantasy has dimensions of 38 feet LOA and 7 feet beam, and is powered by a 3-cylinder diesel engine.  Starting from the bow, she has an open foredeck, a dinette which makes into a small double bed, a nice galley, a head, the engine area, and finally an open stern where the helmsman stands.  There is no shelter for the helmsman in inclement weather, an arrangement shared by almost all the narrowboats.  Pretty basic compared to nb Bobcat or nb Snowgoose, but we were not living aboard, just camping aboard for a week.  She worked out well for us.

Looking aft

Looking forward

The heat aboard was hot water (you can see the white flat panel radiators on the lower walls), supplied by the engine.  When the engine was not running, a very compact propane fired hot water heater and circulating pump took care of business.  I was very intrigued by this heater:


It was located in the head, smack next to the shower and was only six or seven inches wide, by about five feet tall.  I do not know how deep it ran into the wall.  It was manufactured by a Swedish company called Alde, although this appears to have been an earlier model.  In operation it was absolutely silent.

The Scenery

Just a few pictures showing what it is like on the canals...


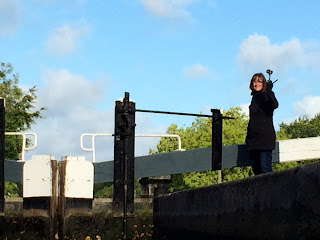
Jane, the lock master

Lessons Learned

Here are the lessons learned by this open-water sailor when transitioning to  canal boating:
  • Yup, it really is like that. This is civilized, low key boating.  Nobody is in a rush, you don't travel fast (less than 4 kt, and at "tick over" when passing moored boats - see below).  And indeed, you don't get going early or travel late.  In fact, most boats do not have running lites, and unofficial hours on the canal are 08:00 - 20:00.  We travelled only from village to village, stopping for the pubs of course.

    And like boaters everywhere, everyone was friendly - from the boats passing in the opposite direction to those we met in the pubs - like Andy and Liz of nb Snowgoose, who we met in The White Swan at Brewood and who later invited us aboard their boat when they moored up in front of us at Gnosall:
    Liz and Andy, nb Snowgoose

  • The rudders on narrowboats are unbalanced.  You really need to lean into the tiller to turn the boat.
  • As you might expect, the canals are shoal at the edges. 
  • Steering is strange near the edges - it is as if the edge is trying suck you in
  • Probably the biggest unexpected thing, and what could likely be the cause of many of the others noted here, is that the boat is large with respect to the canal.  This means that it is not operating in free water like every other boat I have ever been on.  Instead, because the boat occupies a significant portion of the cross section of the canal, it is pushing water ahead of it as it moves.  This water then flows back along the sides of the boat, making it look like you are operating in a current.
  • The passages under the bridges are almost unbelievably narrow, leaving only a few inches on either side of the boat.  The plug flow that I described above is magnified greatly when passing under a bridge, slowing the boat dramatically, and making steering almost completely ineffective until you get clear of the bridge. 
  • As you pass moored boats, they are all pushed around by the plug of water you are pushing ahead of yourself... and then sucked back the other way after you pass.  This is why it is necessary to slow down to idle when passing moored boats.
  • The canals are shallow (narrowboats rarely draw much more than 24").  And they are silted up.  As boats go by, the prop wash stirs up the silt, but since there is virtually no flow in the canal, this just settles back out, to be stirred up again by the next boat.
Would we do it again?  You bet.  The route we chose this time was constrained by a number of factors, but still had us going thru a tunnel (81 yards long), over an aqueduct, and thru a single set of locks.  And it took us to the pubs in the villages of Gnosall, Wheaton Aston and Brewood.

What would we change?  Not much.  More time would be nice.  And a few more locks would be OK too.

And a few more pubs, of course.


Share/Bookmark

Monday, September 14, 2015

Reluctance

Do I look like a guy happily anticipating a swim?

Today was change-the-zinc and scrape-the-prop day. Surprisingly, the zinc was not as bad as it has been in the recent past, but the prop was a happy little colony of barnacles.

Add caption

Maybe, just maybe we have licked the problem we have had for the last few years with "hot" fittings - where the bottom paint was burned off around a couple of fittings.  I believe that this was being caused by a low-level short (that eventually graduated to a full-on fuse-blowing short) in the circulating pump for our heat pump. Could also explain why the zinc lasted better than it has in recent times.

Yes, Jane did the pour-the-hot-water-down-the-back-of-the-wetsuit trick, and as usual, it worked wonderfully.  Because I didn't want to freak myself out, I didn't check the water temp until I was done and sipping a well-earned beer...  It was 54 degrees. It felt a lot warmer than that.


Share/Bookmark

Monday, September 7, 2015

The Drought Is Over

With no rain to speak of for all of June, July, August, and part of May...  things were dangerously dry in Seattle.  This is an area where normally you have to worry about moss taking over your lawn, crowding out the grass (really!).  But not this summer. 
Our yard - no moss there.  (The green traces are our drainfield runs.)
It was a wonderful summer, with clear, warm, sunny days, one after the other.  A great boating summer.  But notice that I used the past tense there...

It is no longer Summer in Seattle.  And it ended with a BANG, on Saturday, August 29. 
(Courtesy of SailFlow)
Look at those wind speeds recorded at Anacortes, where Eolian is berthed - steady winds pushing 50 mph and gusts over 60 mph!  For six straight hours.  Seattle has never, ever seen a storm like this in the summer - it was a record breaker.

Amazingly, it was well-predicted.  In fact, when all of my weather sources converged to predict damaging winds, Jane and I made an emergency run up to Anacortes with our winter fenders and second set of docklines.  Tho it felt strange to be getting ready for winter in the heat of an August day, it turned out to have been the right thing to do.

And it was a doozy.  When it was over, half a million people were without power in the Seattle area, and two had been killed by falling timber.

But it brought rain.  Glorious, glorious rain.  We have had rain on every single day since the storm, including today (9/03).  And *snap* just like that, it is now fall.

I guess I'll be getting the lawn mower out of mothballs...


Share/Bookmark

Monday, August 31, 2015

I Hate Yellowjackets

You're at a quiet anchorage in late summer. There is a slight breeze - just enough to keep you comfortably cool. Then you get out some food or drinks in the cockpit, or begin to bait a crab trap.

And then here they come.

From out of nowhere, you will find your boat surrounded by a buzzing horde of yellowjackets, come for the moisture, or more likely for the meat. Once the first scout gets back to the nest with the news of free eats, you are doomed.


We learned this trick in Canada at Ganges Harbor.  The Tree House Restaurant there has outdoor seating - it should be swarming with yellowjackets.  And one occasionally does fly by.  But you can eat outside in peace.  Why?

Because they have these brown paper bags inflated and hung all over.  Our waitress explained that the yellowjackets see the bags as paper wasp nests and stay away accordingly.  Maybe they are natural enemies?  I don't know.  But give it a try - it works!


Share/Bookmark

Monday, August 24, 2015

More Room In The Cockpit

Eolian's cockpit is not large.  So, to make room for more than four adults, we used to take off the wheel and bungee it to the bimini frame.  Removing the wheel makes the cockpit seem twice as large!

But putting it over on the bimini frame risked rupturing the varnish at the bottom where it rested on the cockpit coaming, as well as where it contacted the frame.  And it was not very secure there, with the bungees.  So, what to do?

I bought a tee - one of those that is hinged; designed to be installed over an existing piece of tubing rather than sliding on from the end.  These have a screw that you tighten to finish the installation and hold it in place...  well, I replaced the screw with a thumbscrew that had a phenolic knob on it - this allows me to move and pivot the tee and then tighten it in place:

In stowed position - out of the way
Then I added a short piece of tubing to provide a surrogate axle for the wheel to rest on.  This is held to the tee, not with a set screw, but by drilling the tubing and thru-bolting it thru the set screw hole with a small bolt and nylock nut.  

Finally I drilled the end of the tubing to accept a Fastpin™ to keep the wheel from sliding off.

The Fastpin keeps the wheel in place

Look at all that space!

(I should have gotten the Brasso out before taking these pictures...)


Share/Bookmark
Related Posts Plugin for WordPress, Blogger...