Showing posts with label howto. Show all posts

Monday, June 3, 2019

Rust Stains 

Over and over again I see people querying for a method to remove rust stains from fiberglass.  And over and over again I have typed in a quick answer.  Because my quick answers are not always complete, and also because I am getting frustrated at answering the same question over and over, I am writing this post so that I can just refer to it.


Rust.

Fiberglass.

The surface of fiberglass (gelcoat, actually) is porous at the molecular level, that is why it stains so easily (spill a glass of wine and you'll see what I mean...).  And so it is with rust stains - they are not *on* the surface, but *in* the surface.

So what is the best way to remove rust stains from gelcoat?  Certainly one method is to simply remove the rust contaminated gelcoat - that is what abrasives do.  Besides the elbow grease required, this approach is limiting because eventually you will run out of gelcoat.

And then there is chemical treatment.  Boy have I seen a wide range of suggestions here:
  • Distilled white vinegar
  • Cider vinegar
  • Coca Cola
  • Pepsi Cola
  • Ospho
  • Whink
  • Bar Keeper's Friend
  • Starbrite
  • Scotchbrite
  • FSR
  • Clay Bar
  • Rubbing compound
  • Bleach (numerous variants here...)
  • ...
Some of these are abrasives, and as mentioned above, they work by removing the stained gelcoat.

Some of the non-abrasives will be marginally effective.

But for a sure-fire, elbow-grease free and effective solution, use oxalic acid.

Oh no!  Acid sounds scary!  Must run away!  Oxalic acid is a weak acid, in the same vein as vinegar but a little stronger.  Do you wear rubber gloves when handling vinegar?  I didn't think so.

Oxalic acid is a crystalline solid - looks a lot like sugar.  To be effective, it must be used in solution.  Now here is an interesting fact:  oxalic acid is way, way more soluble in hot water than cold...  so when making a solution, always use hot water.  And always make a saturated solution (that is, no more will dissolve in the water - you can tell because there are still a few undissolved crystals on the bottom).

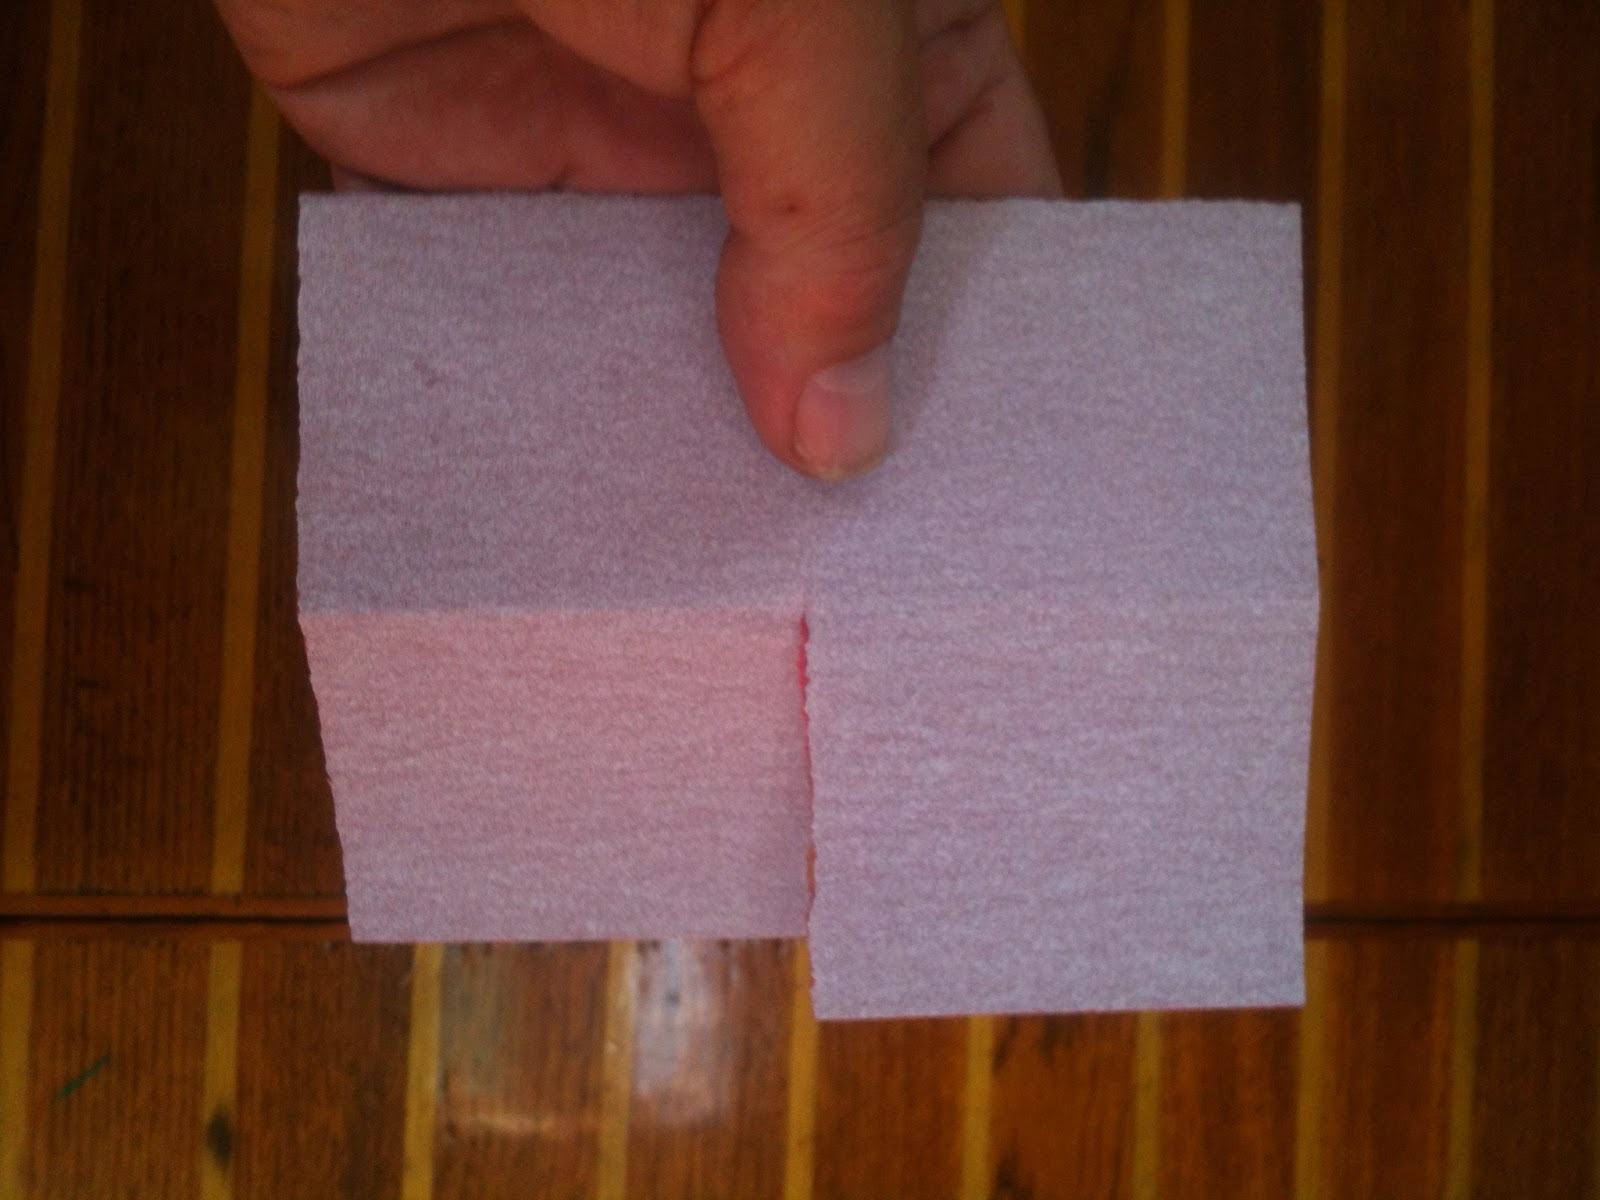
So just make up a saturated solution of oxalic acid, wet a piece of paper towel with the solution and stick it on the stain.  That is all.

Also some notes:
  • Bar Keeper's Friend is a soft abrasive with a small amount of added oxalic acid.
  • The active ingredient in FSR is oxalic acid.
  • Whink contains HF - hydrofluoric acid.  HF is scary stuff - it will even dissolve glass.
  • Bleach will be completely ineffective.  In fact it may serve to set the stain.
  • Phosphoric acid (Ospho, Coca Cola, Pepsi Cola) will be marginally effective
 So how would your average boat owner be able to obtain this magic oxalic acid?  Actually it is quite easy.  Oxalic acid is sold at Home Depot, etc. as "wood bleach"... look for it in the paint section.  Now why would this be?  Because the dark brown color in wood is due to iron oxide - rust.  And by the way, the dark brown staining from tannin-loaded waters is also due to iron oxide - oxalic acid will work on it too.

Now a final note on toxicity.  You have already eaten oxalic acid.  The sour taste in rhubarb is oxalic acid.  But you don't eat the leaves of rhubarb - why?  Because the oxalic acid concentration in the leaves is higher.  As with almost everything, the dose is the poison (even water and oxygen...  drink too much water and it will kill you...  deep sea divers use exotic gas mixtures containing far less than the 21% oxygen in the air because the pressure makes oxygen that much more dangerous).  So don't eat or drink the acid solution.  Don't breathe any dust.  Don't rub it into a cut or use it as an eyewash.  Wash your hands after contact.  It is about 3 times more toxic as a poison than aspirin, and about 1/4 the toxicity of caffeine.  Yes, it is poisonous but no heroic precautions are necessary.


Share/Bookmark

Tuesday, September 11, 2018

How To: Shuck Oysters 

It has come to my attention that not everyone knows how to shuck oysters.  Like many things, it is not hard, but it does require the right tools.  I like this Oxo oyster knife - it is sturdy and has a slight curve up toward the flat side, which you probably can't see in the picture.  Sorry.  The back side has a reinforcing rib which makes it quite stiff and sturdy.

Oxo Oyster Knife


So grab an oyster.  Hold it with the hinge end (the thick, usually pointy end) towards you, and with the flat, or flatter side up.

Your snack awaits

Now, where to insert the knife?  Examine the edge of the oyster and you will see a zone, approximately half way between top and bottom, where the layers of the shell are very close together.  If you are lucky, you may see a dark band near the center. This is the junction between the lower and upper shells, and is not actually sealed. Instead the oyster is mightily holding the two shells together with its big muscle.

Where does the knife go in?

Nolw here's where you could get hurt.  Professional oyster shuckers (at an oyster bar, for example), frequently wear a chain mail glove on their left hand - you probably won't have that, so be *very careful*!

The moment of truth
Touch the knife, flat side up, to the junction between the lower and upper shells, about halfway between the tip of the shell and the hinge. Apply some pressure and twist the knife a little to help it penetrate the joint. Don't worry if you don't get exactly on the junction... the twisting motion will guide the knife tip to the junction. DON'T POKE YOURSELF IN THE LEFT HAND! If you're pushing really hard, you're doing it wrong. Twist more; push less.

Once you get the tip between the shells, swing the knife side to side while slowly pushing it in further, keeping the tip against the inside of the upper shell.  What you are trying to do is to cut the muscle that is holding the shells together.   It will be about midway across the oyster.  You'll know when you cut the muscle - suddenly there will be nothing holding the shells clamped shut.  Open carefully by twisting the knife, being careful not to spill the liquor inside, and be sure to scrape any meat off the under side of the upper shell.

Enjoy in your favorite way!


*No oysters were harmed in making this post - this was a re-enaction.  We ate them last nite...


Share/Bookmark

Tuesday, May 24, 2016

How To Coil A Hose


Now what?

Previously I talked about how to coil a line, using a figure-8 pattern in order to avoid imparting twist...  twist that would cause problems when the line is taken off the coil.

Well, that same problem also exists with stiffer things, like hoses.  Except that (sticking with hose) a figure-8 coiling pattern really doesn't work very well.  

In a couple of pictures, here's how to coil a hose without adding twist:

Put the first turn of the hose on the bracket in the usual way.  This puts a half-twist into the hose.


But for the second turn, instead put a REVERSE twist into it, making the free end come out UNDER the turn instead of over it, cancelling out the twist imparted by the previous turn.  The first time you do this it will feel awkward.  But after the tenth time, it will feel completely natural.

Just alternate regular turns and reverse turns for the rest of the length of the hose.


You'll end up with a neat coil, and more importantly, one that has no twist in it so that when you pay it off of the bracket, you won't have kinks appearing.

This works just as well for other things too, like a heavy extension cord, for example.  But here is a caution: when both ends are free, it is all too easy to withdraw an end from the the wrong side of the coil when unwinding it.  If you do this, instead of a twist-free line, you'll get a whole series of overhand knots.  Of course, with a hose that stays attached to the hose bib, it is difficult (but not impossible...) to make this happen.

Share/Bookmark

Monday, April 4, 2016

Corrosion, Corrosion

For a boat on salt water, corrosion is an omnipresent demon.


Even inside.  This is the spout on our galley sink which is piped to a saltwater foot pump. And to the cooling water discharge from our 12V refrigeration system, meaning that it has saltwater flowing out of it whenever the refrigeration compressor is running, as a telltail. Look closely at the inside of the right-hand bend... yup, the aluminum has corroded thru. I don't understand this... aluminum is supposed to be reasonably proof against saltwater.  The pipe is clamped to the sink in a plastic fixture, and is connected below the sink via vinyl tubing...  ruling out galvanic corrosion.  The entire refrigeration system is 12V, so stray 110V current cannot be an issue.  The compressor is powered by an external motor thru a V-belt. 

But.

The motor and compressor are mounted on the same metal plate, and there are some pressure switches to control the motor mounted on the compressor.

Is that enough to cause stray current corrosion, tho there is no direct connection between the refrigeration unit and the aluminum tubing except via the saltwater itself?

Or is the corrosion simply the result of flowing saltwater washing away the protective oxide layer on the inside of the aluminum tubing?  I am very interested in what the net.wisdom has to say about this...

Regardless, this is the second spout that I have installed there, and they have gotten ridiculously expensive.  I am not planning to buy a third one.

Two pieces of 7/16" stainless tubing
Instead, I bought some thin-gauge 316 stainless tubing from Online Metals.  Now, if you've ever attempted to bend tubing, and especially thin-gauge tubing, you know that it requires special tooling to prevent kinking.  The tooling constrains the tube so that it can't collapse and kink while it is being distorted.  I looked up what a tubing bender for 7/16" tubing costs on the Interwebs, and Oh. My. Gosh.

OK, a Plan B is needed.

It is also possible to prevent collapse/kinking if the tubing is filled solidly with something incompressible.  Apparently some people have used ice (fill with water; freeze), but I was concerned that I'd never get the tubing bent before the ice started to melt.  This is where Wood's metal comes in.

This is Wood's metal - it is a eutectic alloy of 50% bismuth, 26.7% lead, 13.3% tin, and 10% cadmium by weight.  It melts at 158°F
I just happened to have some. 

Wood's metal foundry
For a foundry, I purpose-bought a can of tomato paste (69¢), and froze the tomato paste, retaining the can - just the right size.  I put it in a pan with some water and brought the water to a boil - 212°F, or about 50° of superheat.  I then poured the molten metal into the tubing (I had previously blocked one end of the tubing by pushing it into a wine cork - we seem to have plenty of these).  I then immediately plunged the filled tubing into a container of cold water - I had read that quenching creates a fine crystal structure in the Wood's metal, making it more ductile (read: easier to bend).

OK, now to bend.  I created a bending jig and lag-bolted it to a 4x4 in our shed:

Homemade bending jig
Yup, it bent just fine - no kinking, no collapse.

Recovering the Wood's metal
All that remained was to reheat the bent tubing in another boiling water bath to remelt the Wood's metal and pour it out.

And since our galley sink has two of these spouts (one for salt water and one for fresh water, foot-pumped from the tanks), I made another spout.  Gotta be symmetrical, don't you know.


Done
(Clever camera angle conceals dirty dishes in the sink)
A little boat yoga, and the galley sink looks better than it ever has!


Share/Bookmark

Monday, November 2, 2015

Living In Two Places - How To Do It

The Green Bag
From 1997 until 2013 we kept Eolian at the Shilshole Bay marina in Seattle.  During this time she served as our Seattle home because I worked in Seattle.  That meant that the majority of our time was spent onboard, with brief weekend sprints to our log cabin on Camano Island.  Now that I am retired, our time is more evenly split between Eolian (now in Anacortes) and Camano Island.

So, for the last 18 years we have been living in two places.  How does that work?  How do we do it?

First, it takes a lot of organization.  Those of you who know me know that organization is not one of my strong suits, but thankfully, it is Jane's raison d'ĂȘtre.  So what follows here is the system that we have developed to make this work.  Tho in our case it applies to a house and a boat, I imagine it would apply equally as well to the case of two houses (for example, a primary home and a vacation home).

The System

The more self-sufficient you can make each location, the less you will have to shlepp back and forth.  There are limits of course.

In no particular order:
  • Pay your bills in one place; keep all your records in one place.  If you have things in both places, you'll never be sure whether or not you've paid that credit card bill.
  • Have a marshalling location in both places.  That is, a place where things can be collected which need to go to the other location - put things here when you think of them.  This way it is not a giant fire drill when getting ready to leave - things can be accumulated over time.  And then when it is time to pack up, you can be almost certain that nothing has been forgotten.
  • Have a solid, sturdy laundry bag.  It will get dragged back and forth full of dirty clothes going one way and clean clothes going the other.
  • You will need a set of commonly used tools in both locations.  A boat should be well-equipped with tools in any case, in order to be able to handle breakdowns at sea. For seldom-used specialty tools, see The Green Bag.
  • The Green Bag.  The Green Bag always goes with us.  It is a marshalling location for small items.
  • By and large, it works best if grocery shopping is done independently at each location.  Keep a separate grocery list for each location.  This will help prevent, for example, having 3 bottles of ground cumin at each end.  Search for a smartphone app called "Our Groceries" - it allows multiple people to manage a shared grocery list (or multiple lists...).
  • There will always be some food items that need to be transferred, say a partial gallon of milk or some particularly delectable left-overs.  Bag these together and put them in the marshalling location just prior to departure. 
  • You will need a set of commonly used spices in both locations.  For seldom-used specialty spices, see The Green Bag.
  • Have no loose items.  Everything should be bagged if possible.  We make extensive use of those reusable grocery bags that are now so in vogue.
  • Have a formal shutdown process for each end.  Follow it religiously.  In the beginning, it may be necessary to write it down.  After 18 years, not so much.
  • Leave yourself sticky notes to cover unusual circumstances when you think of them - don't try to remember everything at the end when you're packing.  Put them in the marshalling location.
  • Make your cell phone your primary telephone number.
  • Have a single official location for important items that need to travel, such as a checkbook (in our case, this always lives in my briefcase).  Always, always return the item to its official location after use.  If you violate this rule, you will be certain to find yourself at the boat without your prescription sunglasses, for example.
  • Computers are cheap enough now that you can have one at both ends.  But if you are not careful, you computer file systems will be like those two spice drawers...  There will certainly be a collection of directories that you would like to have be in sync on both machines.  Use a cloud service for these, or use a thumb drive to copy these directories back and forth (I use linux - rsync is my friend).
  • Reading material - I have only one word for you here: Kindle.
  • Cell phone chargers and cables are small and cheap - have an adequate number at both ends.
  • Outer gear - keep location specific clothing at each end.  Keep the foulies on the boat and the Carhart chore coat at the house.  If you wear a raincoat to the boat, be sure to put it in the boat marshalling location so that it will go home with you when you leave.
  • Hand projects like knitting should be handled as travelling projects - always prepared to go back and forth.  That is, each should have its own bag and live in it.
So that's how we do it.  Those of you out there who are doing the same thing  have additional suggestions I'm sure...
Share/Bookmark

Wednesday, May 14, 2014

Shape shifting success

Finally: a decent shape

It appears, to me at least, that the effort to remove the excessive draft from the mizzen was successful!   For the first time, the mizzen is pulling while sailing upwind with the main hoisted.  Previously, it was so baggy that it was worthless unless I dropped the main.  And since that would only happen in a blow, when a sail with huge draft is just what you don't want, the sail was previously pretty much a waste.

Also, removing the 7" from the leech has the boom pretty much horizontal, which improves the aethestics of Eolian quite a bit.


Share/Bookmark

Saturday, February 22, 2014

Fill'er up

So, you have a beautiful, bright-finished teak and holly sole. And your brother-in-law brought along his favorite piece of heavy steel 3" angle iron when he came aboard to spend the night (not telling you of course). And he dropped it when getting his jammies out of his duffel.

Now you have a big ugly gouge marring your beautiful sole.  What to do? 

I can tell you that it is possible to fill such a gouge with varnish - our Previous Owner had a TV fall onto the sole - came off of the mount in a seaway.  Not a flat screen... remember those big heavy things with the big cathode ray tube?  Yeah, one of those.  It made a gouge about 1" x 1" and perhaps 1/4" deep.  I did manage to fill it in with varnish - a little at a time.  If you put in too much, it will skin over and not cure.  It took weeks and weeks, all the while with an upside down margerine tub taped over it to keep us from stepping on the work in progress.

I now have a better way.

Use 5-minute epoxy.  It fills the gouge without shrinking, and it cures in, well, 5 minutes. 

Here is an example from the sole in our forward cabin, which I am preparing to refresh.  The example is of a bung that chipped out when the sole was installed 36 years ago.  It has been varnished over many times, but there is still a hole there:


5-minute epoxy applied
After the epoxy cures, it will need to be sanded flush.  To do this without sanding thru the adjacent areas, first tape around the epoxy:

Tape (and a sticky note, lower right)
Now you'll be able to sand it flush to the floor, minus the thickness of the tape.  I used 150 grit open coat aluminum oxide paper from Norton.

Use a sanding block - something to keep the sandpaper flat.  A short piece of a paint stirrer stick works well for this small work.  Only use light pressure on the sand paper.  If you press hard, the paper will conform to the contour of the bump you are sanding - you don't want this.  Instead, you want the paper to cut down the high spots, and eventually the entire bump.  If you find that you need to press hard to make the sand paper cut, then it is dull - it is time for a fresh surface or a fresh sheet.

When you have the repair down as far as you can get with the tape in place, remove the tape (it will probably be partly sanded thru), and carefully take the repair down the last couple of mills until it is flush.  Then remove the 150 grit scratches with 220 grit paper.

Ready for varnish

Your brother-in-law been here?
Here's a big gouge that was also in the area being refinished.  Sadly, I didn't have the foresight to document the process using this one.  It too is now ready for varnish.

I imagine that the correct way to handle the big gouges would be to dutch in a small piece of teak.  I may give that a try in the future.
Share/Bookmark

Wednesday, February 5, 2014

Shape changing

Eolian's masts are canted aft.  This means that, if the booms are to be aesthetically and pleasingly level, the angles between the foot and the luff of the main and mizzen sails must be less than 90°.  Our mainsail was correctly built, but the mizzen was not.  Whether it was incorrectly built for the boat (unlikely), or it was an adapted mainsail (more likely), the cut of the mizzen sail was such that the boom drooped.

Further, flying where it does in the dirty air behind the main, the mizzen needs to have less draft than the mainsail so that it will fill properly.  In another indication that our mizzen is a re-purposed mainsail, it had a lot of draft.

One of the reasons for our acquisition of our Sailrite LSZ-1 was to reshape the mizzen.  And in particular the "Z" part, since this model does the zig-zag stitching that sails use.  So, an afternoon's project: recut the mizzen.

Before removing the sail from the boat, I measured (using a steel, non-stretchy tape measure) the leech of the sail when sheeted in.  Then I raised the boom to where I thought it should be and remeasured the leech.  The difference was about 7".

Next, with the sail on the floor at our cabin, I arranged it so that I could take a wedge-shaped piece of cloth out of the lowest seam, one that had no "complications", like a batten pocket or a second clew for reefing.  This was non-trivial - even tho it is a mizzen, the sail is pretty big, with a luff of 32 feet and a foot of 11 feet.  It just barely fit on the floor, with all the furniture moved away.

Tight squeeze
Next, I struck a chalk line from where that first seam met the luff to a point 7" below where it ended on the leech.  Then with the reference mark in place, I took apart the triple-stitched seam.

No going back now.

Then, allowing a 1" seam allowance, I trimmed away the long wedge-shaped piece of cloth from the lower panel.

Now all I had to do was put it back together.  My first attempt failed.  I simply could not manage all that cloth and keep the seam lined up.

A cloth management problem
So I ripped out my first attempt and I got out my sticky basting tape and stuck the seam together with it.  This is not the crap they sell in sewing notion stores, the stuff that is designed to wash out.  This is 3M stuff I got from Sailrite - it holds like, um, glue.

And this time I spent more time to carefully line things up.  I found that the draft in the sail was created on the bottom of the upper panel - the top of the bottom panel (to the right in the pictures) had been straight, and remained so since I used the chalk line.  But when lining things up with the basting tape, I did not honor the 1" seam allowance I had granted myself, since that would have recreated the draft.  Instead I just pulled the seam straight.  In the center of the sail, it turned out that I had 2.5" of seam.

The only tricky part was at the leech, where I had to be very careful to handle the triple-folded surface and keep the leech line from getting sewed in place.  Well that's not quite true.  Managing all that cloth is a real problem.  You can see that my carefully-flaked upper portion of the sail did not long survive.  It is important to allow the sewing machine to move the fabric, and that requires two handlers, one on each side of the seam, to keep a little slack in front of the presser foot, and to move the sewed section away from the back of the presser foot.  The sail is heavy and bulky; keeping that little bit of slack was not easy.

I triple-stitched the seam using Helios thread.  I see no reason to use anything but the lifetime-guaranteed teflon thread for any kind of outdoor work.

With the sail back on the boat, the boom hangs where I had hoped, and the sail is a lot flatter.  Now all I need is for the seasons to advance enough to take it out on the Sound and see how it looks when it is full of wind...


Share/Bookmark

Wednesday, January 15, 2014

Oooo... Shiny...

Dull.  Boring.

Three posts ago I talked about refinishing Eolian's wheel.  And one post ago I bemoaned the passing of the "good" Brasso.  These two posts were not unrelated, because Eolian's wheel has a bronze hub.  And that hub periodically gets treated to a polishing with Brasso.

But in the last post I referred in passing to the use of a buffing wheel as the tool of choice when polishing metal, and I realized that some of the readers of this blog might not know what a simple, basic and effective tool it is for polishing metal.

The tools
If you have a grinder, then you could have a buffing wheel.  Get thee to a Harbor Freight or whatever your local cheap tool emporium is, and buy yourself a couple buffing wheels - these are made by stacking multiple canvas disks together until you have a combined thickness of about ½", and then sewing them together.  Here I have removed one grinding wheel from my grinder and replaced it with a buffing wheel.

You'll also need compound - the cloth alone is not enough.  That orangish pink bar on the work bench right below the buffing wheel is a bar of rouge.  Well, more accurately, it is a bar of rouge polishing compound. Rouge is a very fine iron oxide powder; the compound is a suspension of rouge in a wax base.  You hold it against the spinning wheel for a moment to charge the wheel, and then you apply the piece of metal to the wheel.  You'll have no difficulty in telling when more compound is needed, because the wheel will simply stop polishing.

(I should be using two hands, but then how would I take the picture?)
Rouge is not the only polishing compound - in fact it is the last and final step when starting with raw, heavily oxidized and rough metal.  But for lightly oxidized brass or bronze, it is ideal.  Oh, and you should not mix compounds on a wheel - get one wheel for each type of compound you buy.

When applying the metal piece to the wheel, you must think about what is happening.  You must be very careful to not let the rapidly spinning wheel catch on any edge - if it does, it will grab the piece right out of your hands and throw it against the wall, probably damaging the piece, the wall, and possibly your hands in the process.  Also, since the wheel is continuously shedding threads - you absolutely must wear safety goggles.  If you are working on a small piece, it will rapidly get too hot to hold.  Wearing a pair of heavy leather work gloves is a good idea.

Ten Minutes:  Ta DAA!
It is quick and easy to get a factory finish on a piece of metal using a buffing wheel - because this is how the factory polishes metal!

(I've seen attachments for an electric drill to hold a buffing wheel.  These are not effective because the drill does not turn fast enough.  But I have chucked a buffing wheel onto an angle grinder to work on pieces that I cannot take to the grinder - this  works well.)
Share/Bookmark

Wednesday, December 18, 2013

It's aliiive!

There is froth in there

(Cue maniacal laughter and phony German accent)   Bwa ha ha ha haaaa!  I haf created da life!

Inspired by Valerie's efforts on s/v Letitgo, I have made now two batches of baguettes, and will soon be graduating to the use of a levain.

What's that you ask (rhetorically)?  Why it is a natural leavening, consisting of a culture of yeast and bacteria.  You might have heard it called "starter" or "sourdough starter".

How do you make it?  (Aren't rhetorical questions great?)  It really couldn't be easier.  No really.  You mix flour and water in equal proportions and leave it out on the counter to spoil.  That's it.  Give it a shake once a day or so.  The yeasts and bacteria that are in the air everywhere, that are in every breath we take, and who were here on the Earth long before we were, will colonize the medium. 

But wait - how do you get the right yeast and the right bacteria?  This is one of those rare, rare situations...  No matter which yeasts and which bacteria initially colonize the medium, there will be new arrivals every day.  Eventually, the strongest, fittest ones will survive and dominate, pushing the others towards local extinction.  And in a truly weird twist of nature, no matter where you are in the world, it is these same battle survivor species that are the ones you want.  It's almost as if dandelions were the desirable species for yards.  You'd scrape off your yard, and yes, eventually it'd be carpeted with a beautiful green and yellow display, with no effort on your part.

So in my levain, the early colonists are busy building homes, and the battle is just beginning.  Now that there is life in there, I will periodically dump half of the levain and replace it with fresh flour and water.  The colonists need food, after all.

In a couple of weeks it'll be ready for use in bread making.
Share/Bookmark

Wednesday, October 30, 2013

Getting the oil filter off

We have reached that portion of the year when boats are being tucked in for long winter naps.  This is an excellent time to change the oil in your engine so that it rests all winter with fresh, non-acidic oil.

This means that it is time to change the oil filter.  And there we are all faced with the same problem:  That filter which was so carefully installed, following the manufacturer's recommendation to only turn it 3/4 of a turn after the gasket contacts (they even paint little marks on the filter to help you determine this)?  That filter which was installed with your bare hands and nothing more?  Well it is now welded to the engine.  What went on with bare hands is by no means coming off that way.

Man is the tool maker.  No matter the difficulty, he has invented a tool to overcome it.   Removing a stuck oil filter is no exception - since the spin-on oil filter replaced the element-in-a-canister, many tools have been invented to deal with the seemingly inevitably recalcitrant filter.

On Eolian, I use a rubber strap wrench to loosen the oil filters on the engine and the generator:

Strap Wrench
This tool is cleverly designed so that the harder you pull on the handle to turn a cooked-on filter, the tighter the strap grips the casing of the filter.  It is a one-size-fits-all tool - all you need to do to adjust it is to pull on the strap.

But not every filter is mounted where there is enough free space to swing the handle of this wrench.  In my shop I have a couple of alternatives which have served me well working on automotive engines over the years. 

Mechanic's metal strap wrench

This is another kind of strap wrench - but on this one the strap is a metal band, and it has no handle.  Instead, you use your 3/8" ratchet wrench with an extension as a handle, which allows it to be used in much tighter quarters.  Needless to say, you can apply much more torque with this tool than with the rubber strap wrench.  This tool does not have the range of adjustment of the rubber strap wrench; nevertheless it has worked on every Ford and GM filter I've used it on.  It wouldn't fit the small oil filter on Eolian's generator tho.

"The Crusher"

Next is a tool that grips the filter from the end.  For really tight spaces this is the ideal tool.  As torque is applied to the nut, a cam action pulls the two grippers tighter and tighter together, eventually crushing the body of the filter.  No way can this slip.

I do not use the 'socket wrench' type of filter grippers - those cup-like things that have an interior contour like the shape of the end of the filter body.  First, all the filters are different, so you need to have a collection of them.  And they don't grip nearly as securely as the tools above.

Finally, when all else fails, more than one desperate mechanic (possibly including your correspondent) has simply driven a screwdriver clear through an oil filter and used it as a lever to turn it.  This method is crude, messy, and effective.

Whatever tool you use, it is a good idea to put on a new filter once a year.  Filters are cheap; engines are expensive. 

Now go get dirty.


Share/Bookmark

Wednesday, September 11, 2013

Sandpaper origami

Sandpaper comes in standard sheets that are 9"x11". I know of no tool that uses the full-sized sheets, and this is certainly too big to use for hand sanding.  For hand sanding, start with a quarter of the full-sized sheet.  When splitting down the big sheet, cut on a fold, from the paper side of the sheet so as to minimize the damage to the knife (here I am using one of our galley knives - don't tell Jane).

Start with a quarter of a full-sized sheet

If you then just fold the quarter sheet into quarters, there will be grit-sides of the sandpaper in contact.  This will dull the grit and cause it to shed abrasives.  To prevent this, follow this procedure:

First fold the quarter sheet in half, paper side in, the short way:

Fold in half the short way

Next, open it up and fold in half the long way.  Both folds should be creased firmly.

Fold in half the long way

Now open up the paper.  It should look sort of like a tent, or a roof with four gables.

Looks like a tent

Along one of the short folds, tear the paper carefully, to the center of the sheet.

Tear one of the short folds to the center

Fold one of the resulting flaps under,

Fold the flap under
And then fold the doubled flap under...

Then fold the doubled side under

VoilĂ 
Et voilĂ !   A perfectly sized piece of sandpaper for hand work, with no grit sides facing each other.  Two sides are exposed; when they are dull, you can refold the paper to expose the unused sides.

And by the way... when all four sides have become dull, don't keep sanding in a vain attempt to save money on sandpaper.  Get another quarter sheet - that's what the pros would do, because their labor is worth more than the price of a quarter sheet of sandpaper.  Yours is too.

[Editor's note: Also, don't scrimp when purchasing the sandpaper - buy the good stuff.  Here I am using Norton's open-coated aluminum oxide paper.  It stays sharp a long, long time, and because it is open-coated it is very resistant to clogging - even in 220 grit.]
Share/Bookmark

Monday, August 26, 2013

How to: Mask a Handrail

Do you keep your teak handrails finished bright?  On Eolian we do, and so varnishing them is a part of the annual varnishing task.  Therefore masking off the loops where they meet the deck is a necessity.  We have 40 loops on Eolian - this is not a trivial task.  So then, how to do it?

There used to be available masking tape that was pre-cut to fit the curves at the ends of the loops, but I can't find it online anymore.  In any case, this was a very expensive solution - we've never used it.

Instead, here's how we mask off the loops, using just regular 1" tape.  To illustrate, I'll show the process on an end loop because there is increased visibility there.

The first step is to find a nice anchorage!  There is no need to do this at the dock.  Why stay at the dock when you could be at anchor in a quiet cove somewhere?  We are anchored in Eagle Harbor for these pictures.
The starting point

First, apply tape strips along the long sides.  As I have mentioned before, it is wise to hold the tape back from the loop by a tiny amount so that the varnish will help with sealing the loop to the deck.
Apply two strips to the sides


Next, apply strips at the ends of the loops.  The fit will be terrible of course, leaving triangular areas uncovered.
Add strips at the ends


Next, tear a 3" or so strip of tape down the middle, lengthwise.  If you are using 1" tape like us, this will give you two short lengths of 1/2" wide tape.
Tear some tape down the middle

Now you can tear off pieces of the narrow strips, making roughly 1/2" square pieces of tape with one straight edge.  These are too small to place accurately with your hands, so I stick them gently to the tip of a knife for ease of handling.


Using the knife as a handle, position the tape, and then press it down with a finger tip when it is correctly positioned.  The knife allows you to get at every corner. 


Apply overlapping pieces of tape to follow the curve.


The process sounds tedious, and well, it is.  But with practice, I do each one in under 2 minutes (and having 40 to do each year gives me lots of practice).
Ready for sanding and varnish

So we're talking about roughly an hour and a half to mask off all the handrails - that's not a terrible way to spend an afternoon at anchor, is it?


And a shoutout to the folks on the dark blue catamaran that said they read this blog as they motored out of Eagle Harbor Sunday morning!


Share/Bookmark

Monday, July 22, 2013

That annual task

It's that time of year again - when the days of warmth and sun stretch out forever in front of us.  Days when you can absolutely depend on not having rain for two or three days in a row.  So that means lots of wonderful sailing, right?

Well, no.  It means that you can depend on not getting rained out in the annual varnish task.  It goes something like this:


  1. Mask everything with 3M 2080 tape - the kind that has an adhesive that tolerates sunshine and moisture (rain, or dew).  The regular 2090 tape becomes impossible to remove after a couple of days of sunshine... 

    Make sure that your masking does not actually cover the joint between the wood and the substrate.  Hold the masking 0.5 mm back, thus allowing the varnish to provide a seal between the wood and the substrate.  There is every reason to expect that the back side of the wood was never varnished.  If moisture gets behind the wood, it will soak into the wood and will lift the varnish.

  2. Sand everything.  I use 150 grit open coat aluminum oxide sandpaper from Norton.  I've tried a lot of others, but this is the best stuff I've discovered.  It doesn't load up with the dust. 

    I do all my sanding by hand, using hand-sized quarter sheets cut from the standard 9x11 sheets.  Each of these hand sheets gets folded in half each way, and then one of the creases is torn to the center of the sheet.  This allows me to fold the paper into a 2.75x2.25 inch pack which is perfect for hand work.  By making the tear, the pack can be folded in such a way that the grit sides of the unexposed paper do not touch each other, which would dull the grit.

    The objective of the sanding is two-fold - to provide a good 'tooth' on the surface so that subsequent coats of varnish can mechanically bond to the surface, and to remove the surface imperfections from last year's coats.  Yeah, there always are some.

  3. Wait for the perfect weather.  For me, this means a calm, cool morning.  If it is windy, I find that the varnish is drying too quickly and I get visible joints between the sections because I cannot keep a wet edge.  If the sun has been shining on the surface for long, it also causes the varnish to dry too quickly (see  item 2).

  4. Apply the first coat of varnish.  Pay attention to the consistency of the varnish.  You may have to add some thinner to allow you to keep a wet edge.  Also, if the varnish is too thick, it will go on too thick, and will result in wrinkly areas where the surface cured before the bulk underneath.  These of course can be sanded out next year... (see item 2)

  5. Wait 24  hours.  This allows the varnish to cure sufficiently that the brush won't drag when applying the next coat.  But not so much that the next coat won't chemically bond.  If you wait more than 24 hours, then you will need to sand again to promote a solid bond.  But this time you should use 220 grit.  The sanding scratches from 150 grit will disappear after two coats; the sanding scratches from 220 disappear after a single coat, presuming that it hasn't been thinned too much.  Having dependable weather is sooo important because it allows you to avoid having to sand between coats. 

    Be very careful to not leave holidays or gaps between sections (see item 2).  This is much more difficult with the second coat than the first, because the matte finish from sanding gives a great background for the first coat.  It helps to pick out a series of landmarks, "OK, this section stops at the bung".
In the past, I applied 3 coats each year, the reasoning being that the sun gets one coat, I sand off one coat, and so I would be adding a net one coat each year.  This is good reasoning after recently taking things back to wood, when the varnish film is relatively thin.  But after years and years of this, the film gets so thick that it cannot move with, stretch and shrink with, the underlying wood.  And so it becomes prone to becoming detached.

I have also concluded that the hardness and stiffness of a urethane varnish film causes similar problems of not being able to move with the wood, thus resulting in premature failure and detachment of the film.  I am no longer using urethane exterior varnish.

It's a shame that it takes so many years to build up an experience base that allows you to get good brightwork.  I am still learning.  I will probably take everything back to wood next year so that I can erase all the accumulated mistakes made in the past 15 years and start over.  If, that is, I can find the ambition next year...


Share/Bookmark
Related Posts Plugin for WordPress, Blogger...